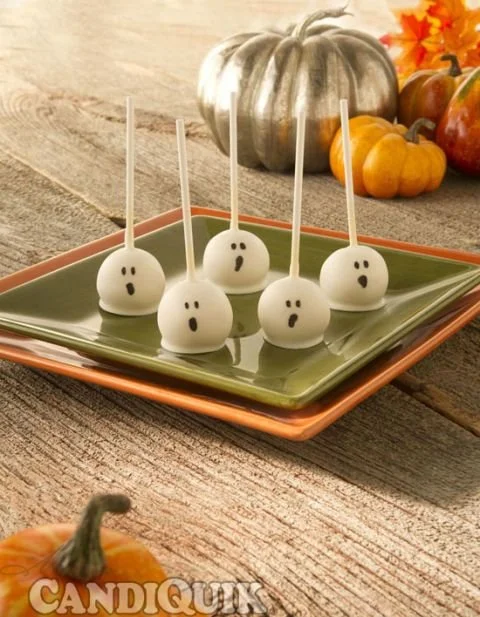
Halloween Cake Pops That Are Almost Too Cute to Eat are the perfect treat to celebrate the spooky season. With their adorable decorations and delicious chocolatey flavor, these cake pops are sure to be a hit at any Halloween gathering or party. They’re not only fun to make but also a delightful way to indulge your sweet tooth while enjoying some crafting fun.
Why You’ll Love Halloween Cake Pops
- Easy to Make: This recipe uses a boxed cake mix, making it beginner-friendly and quick to prepare.
- Customizable Decorations: You can let your creativity shine with various sprinkles, candy eyes, and chocolate melts for a unique design.
- Perfect for All Ages: Kids can help assemble and decorate these cake pops, making it a fun family activity.
- Great for Parties: Their cute appearance and portable nature make them an ideal treat for Halloween parties.
- Deliciously Indulgent: The combination of rich chocolate cake and creamy frosting creates a tempting dessert everyone will love.
Recipe Overview
- Prep Time: 20 minutes (plus freezing time)
- Cook Time: 30 minutes
- Total Time: 1 hour (plus freezing time)
- Servings: 12 to 15 cake pops
- Difficulty Level: Easy
Ingredients You’ll Need for Halloween Cake Pops
-
Cake Ingredients:
- 1 box chocolate cake mix
- 1 cup frosting (any flavor)
-
Decoration Ingredients:
- 1 package candy melts (orange and black)
- Lollipop sticks
- Sprinkles (optional)
- Candy eyes (optional)
Note: Using a sturdy frosting helps bind the cake crumbles, making a great texture for your cake pops. If you’re short on time, store-bought frosting works just as well.
How to Make Halloween Cake Pops
-
Bake the Cake: Prepare the chocolate cake according to the instructions on the box. Once baked, allow it to cool completely in the pan.
-
Crumble the Cake: Once cooled, crumble the cake into a large bowl. Use your hands to break it into fine pieces, ensuring there are no large chunks.
-
Mix in the Frosting: Add the frosting to the crumbled cake and mix until fully combined and the mixture holds together when squeezed.
-
Form Cake Balls: Use your hands to roll the mixture into small balls, about 1 inch in size, and place them on a lined baking sheet.
-
Insert Lollipop Sticks: Carefully insert lollipop sticks into each cake ball, pushing them about halfway into the center.
-
Freeze for Firmness: Place the tray in the freezer for about 30 minutes, or until the cake balls are firm.
-
Melt Candy Melts: While the cake pops are freezing, melt the candy melts in a microwave-safe bowl according to the package instructions, stirring until smooth.
-
Dip Cake Pops: Dip each frozen cake pop into the melted candy, ensuring it is coated completely. Allow any excess coating to drip off.
-
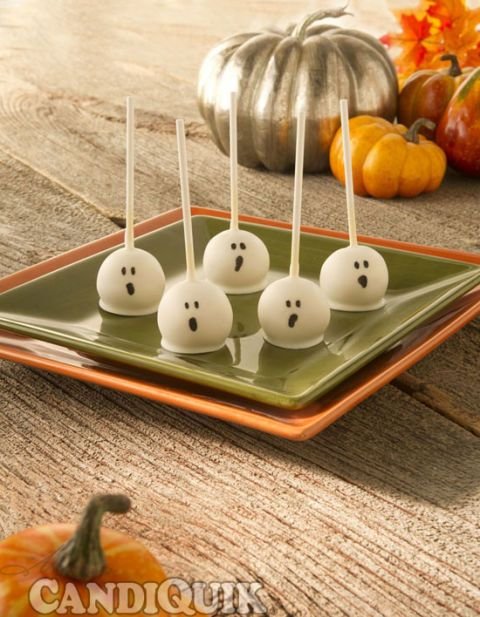
Decorate Before Drying: Before the candy coating sets, decorate your pops with sprinkles or candy eyes for fun Halloween designs.
-
Let It Set: Place the decorated cake pops back on the lined baking sheet and allow them to dry completely before serving.
Tips for Success
- Cool the Cake Thoroughly: Make sure the cake is completely cooled before crumbling to avoid a soggy mixture.
- Use a Thick Frosting: A thicker frosting will help your cake pops maintain their shape better when rolling and melting.
- Avoid Overheating Candy Melts: Heat the candy melts in short bursts to prevent scorching and achieve a smooth consistency.
- Ensure Freezing Time: Don’t skip the freezing step; it’s essential for ensuring the cake balls hold up when dipped.
- Experiment with Flavors: Feel free to experiment with different cake and frosting flavors for a personalized touch.
Easy Variations
- Healthier Option: Use a sugar-free cake mix and low-fat frosting for a lighter version.
- Flavor Swaps: Substitute the chocolate cake with vanilla or red velvet for a different flavor profile.
- Themed Decorations: Change candy melts to festive colors for other holidays (green and red for Christmas, pastel for Easter).
- Add Extracts: Enhance flavor by adding a teaspoon of vanilla or almond extract to the cake mixture.
- Stuffed Cake Pops: Insert a small piece of chocolate or candy into the center of each cake ball before forming it for a surprise treat.
What to Serve with Halloween Cake Pops
- Apple Cider: The warm spices of apple cider perfectly complement the sweetness of the cake pops.
- Hot Chocolate: Cozy and rich, hot chocolate pairs wonderfully with these chocolatey treats.
- Caramel Dip: Serve with caramel sauce for a sweet dip that adds extra indulgence.
- Halloween-Themed Snacks: Offer alongside themed snacks like pumpkin-shaped cookies or ghost-shaped brownies for a festive spread.
Storage and Reheating
- Refrigerator Storage: Store leftover cake pops in an airtight container for up to 5 days in the refrigerator.
- Freezer Storage: For long-term storage, freeze decorated cake pops in a single layer, then transfer to a sealed bag for up to 3 months.
- Reheating Method: If needed, let them thaw in the refrigerator overnight before serving. For frozen, do not self-reheat; they are best served cold.
- Meal Prep Note: These cake pops can be made ahead for parties; simply prepare and freeze until the day of your event.
Common Mistakes to Avoid
- Skipping the Cooling: Not allowing the cake to cool fully can result in a messy mixture.
- Over-Mixing the Cake and Frosting: Mix just until combined; overly mixing can make cake pops dense.
- Neglecting Freeze Time: Without proper freezing, the cake pops may lose their shape during dipping.
- Not Using Enough Coating: Ensure a generous dip in the candy melts to effectively cover the cake pop.
- Rushing the Decorating: Decorating while the candy is still warm can cause the toppings to slide off.
Halloween Cake Pops: Background & Cultural Inspiration
Halloween cake pops are a modern take on traditional cake decoration practices, combining fun and creativity in a bite-sized treat. Originating in the United States, cake pops became popular in the early 2000s, thanks to their fun, festive appeal and versatility. They’re often favored for themed parties and celebrations, as they can be customized to fit any theme or season, making them a staple in Halloween treats. Celebrating Halloween with crafts and sweets entertains the spirit of the holiday, inviting families to come together over delicious creations.
Frequently Asked Questions
Can I make these cake pops ahead of time?
Yes! You can prepare and freeze the cake pops up to 3 months in advance. Just thaw them in the refrigerator overnight before serving.
What frosting should I use?
You can use any frosting flavor you like, but thick varieties that can hold the cake mixture together work best.
How do I store leftover cake pops?
Keep the cake pops in an airtight container at room temperature for 3-5 days or in the refrigerator for up to a week.
Can I use chocolate instead of candy melts?
Yes, you can use tempered chocolate instead, but be aware that it may be harder to coat evenly and set.
Why did my cake pops fall apart when dipping?
This usually happens if the cake balls are not firm enough. Ensure they are fully frozen before dipping.
Final Thoughts
Halloween Cake Pops That Are Almost Too Cute to Eat are not just a treat; they are a delightful way to bring joy and creativity to your Halloween festivities. Whether you’re making these with family or bringing them to a party, they are sure to impress. Give this easy recipe a try, and enjoy the fun of creating and sharing your very own festive treats!
PrintHalloween Cake Pops
These adorable Halloween Cake Pops are a fun and festive treat, perfect for celebrating the spooky season with delicious chocolatey flavor and customizable decorations.
- Prep Time: 20 minutes
- Cook Time: 30 minutes
- Total Time: 60 minutes
- Yield: 12 to 15 cake pops
- Category: Dessert
- Method: Baking, Freezing
- Cuisine: American
- Diet: Vegetarian
Ingredients
- 1 box chocolate cake mix
- 1 cup frosting (any flavor)
- 1 package candy melts (orange and black)
- Lollipop sticks
- Sprinkles (optional)
- Candy eyes (optional)
Instructions
- Prepare the chocolate cake according to the instructions on the box. Once baked, allow it to cool completely in the pan.
- Crumble the cake into a large bowl into fine pieces, ensuring there are no large chunks.
- Add the frosting to the crumbled cake and mix until fully combined.
- Roll the mixture into small balls, about 1 inch in size, and place on a lined baking sheet.
- Insert lollipop sticks into each cake ball, pushing them halfway into the center.
- Place the tray in the freezer for about 30 minutes, or until the cake balls are firm.
- Melt the candy melts in a microwave-safe bowl according to the package instructions.
- Dip each frozen cake pop into the melted candy, ensuring it is coated completely.
- Decorate with sprinkles or candy eyes before the candy coating sets.
- Allow the decorated cake pops to dry completely before serving.
Notes
A thicker frosting helps your cake pops maintain their shape better when rolling and melting.












