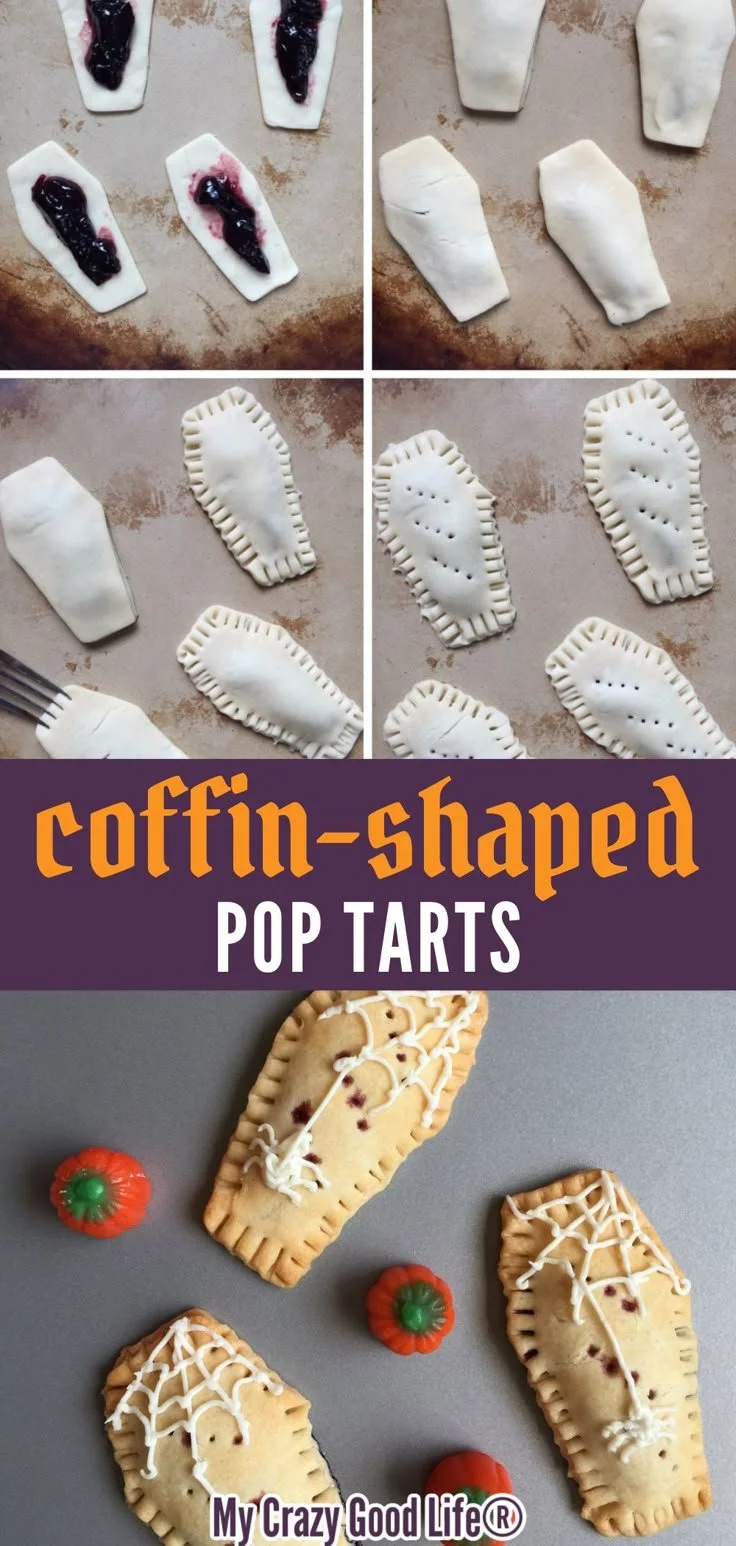
Coffin Shaped Homemade Pop Tarts are the perfect treat for Halloween festivities, combining nostalgia with a playful twist that is sure to delight both kids and adults alike. These delightful pastries are easy to make and can be filled with your favorite fruit jam, making them a comforting and satisfying option for any gathering. Plus, they add a fun and spooky element to your seasonal dessert table.
Why You’ll Love Coffin Shaped Homemade Pop Tarts
- Easy to Make: This recipe is beginner-friendly, requiring just a few simple ingredients and basic pastry skills. You’ll be amazed at how quickly you can whip up these festive treats.
- Customizable Fillings: With the option to use any fruit jam or filling you desire, there’s no limit to the flavor combinations you can create. Whether you prefer strawberry, blueberry, or something more unique, the choice is yours.
- Perfect for Halloween: The coffin shape adds a playful yet spooky vibe, making these pop tarts a hit at Halloween parties, school events, or as a fun family dessert.
- Great for Meal Prep: These pastries can be made in advance, making them a convenient option for busy days or unexpected guests. Simply freeze them and bake as needed for a fresh treat.
- Fun to Decorate: Personalize your pop tarts with icing and food coloring to really make them stand out. Decorating can also be an enjoyable activity for kids!
Recipe Overview
- Prep Time: 30 minutes
- Cook Time: 15-20 minutes
- Total Time: 50 minutes
- Servings: Makes about 8 pop tarts
- Difficulty Level: Easy
Ingredients You’ll Need for Coffin Shaped Homemade Pop Tarts
-
For the Dough:
- 1 cup all-purpose flour
- 1/4 cup unsalted butter, chilled and cubed
- 1/4 cup granulated sugar
- 1/4 teaspoon salt
- 2-3 tablespoons cold water
-
For the Filling:
- 1/2 cup fruit jam or filling of choice (e.g., strawberry or blueberry)
-
For the Topping:
- 1 egg (for egg wash)
- Powdered sugar (for icing, optional)
- Food coloring (for decoration, optional)
How to Make Coffin Shaped Homemade Pop Tarts
-
Prepare the Dough: In a mixing bowl, combine the flour, sugar, and salt. Add the chilled butter and mix until the mixture resembles coarse crumbs.
-
Form the Dough: Gradually add cold water, a tablespoon at a time, until a dough forms. Wrap the dough in plastic wrap and refrigerate for 30 minutes to firm up.
-
Preheat the Oven: Preheat your oven to 350°F (175°C).
-
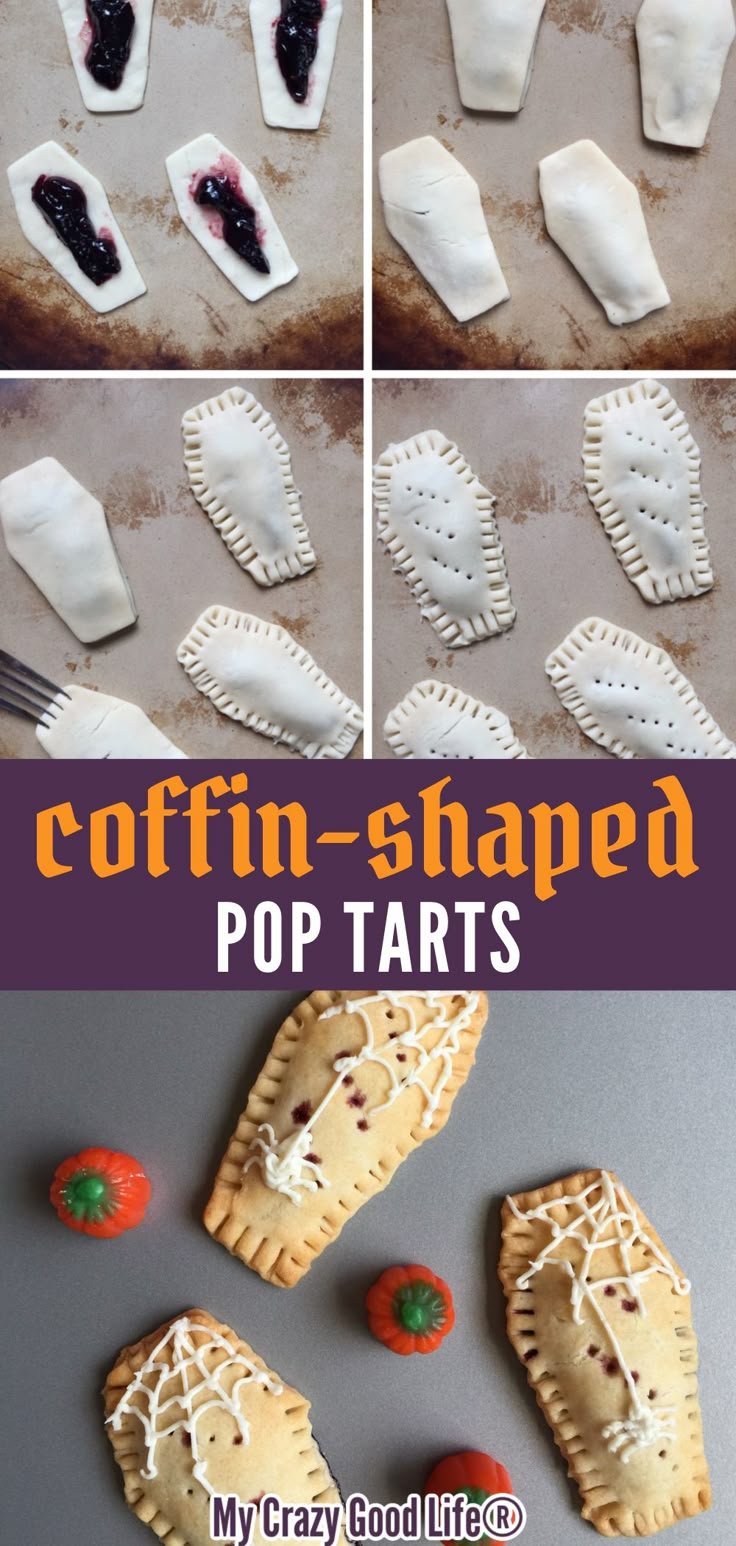
Roll Out the Dough: On a floured surface, roll out the dough to about 1/4 inch thick. Cut it into coffin shapes using a knife or a cookie cutter.
-
Add the Filling: Place a tablespoon of fruit jam in the center of half of the shapes, ensuring you leave a little space around the edges.
-
Seal the Pop Tarts: Top the jam-filled shapes with the remaining dough shapes, sealing the edges with a fork to prevent the filling from leaking during baking.
-
Prepare for Baking: Brush the tops of the pop tarts with the egg wash for a golden finish.
-
Bake: Place the pop tarts on a baking sheet lined with parchment paper and bake for 15-20 minutes, or until they are golden brown.
-
Cool and Decorate: Allow the pop tarts to cool slightly before decorating with powdered sugar icing and food coloring if desired.
Tips for Success
- Use Cold Ingredients: Keeping the butter and water cold helps create a flaky pastry texture. Chill your bowl and utensils if necessary.
- Don’t Overwork the Dough: Mix the dough just until it comes together to ensure a light and flaky crust.
- Sealing the Edges: Make sure to press the edges firmly with a fork to seal, preventing the jam from leaking during baking.
- Watch the Baking Time: Ovens can vary, so keep an eye on your pop tarts to avoid over-baking. They should be golden brown and slightly puffed.
- Cooling Time: Let the pop tarts cool slightly before icing to avoid melting your decoration.
Easy Variations
- Gluten-Free Option: Substitute all-purpose flour with a gluten-free flour blend. Ensure other ingredients are gluten-free as well.
- Chocolate Filling: Swap the jam for chocolate hazelnut spread for a decadent twist.
- Savory Version: Use cream cheese mixed with herbs as a filling for a savory pop tart option.
- Add Spices: Mix cinnamon or nutmeg into the dough for a cozy flavor perfect for fall.
- Themed Decor: Use dark chocolate icing mixed with orange food coloring for a spooky Halloween-themed decoration.
What to Serve with Coffin Shaped Homemade Pop Tarts
- Hot Apple Cider: The warm spices in apple cider complement the sweetness of the pop tarts perfectly, making for a cozy pairing.
- Ice Cream: Serve with a scoop of vanilla or pumpkin ice cream for a delightful dessert option.
- Fresh Fruit Salad: A light fruit salad balances the sweetness and adds freshness to your dessert table.
- Milk or Almond Milk: A classic drink choice, milk enhances the nostalgia of the pop tarts and provides a comforting dip.
- Coffee or Tea: This can elevate the treat to more of a brunch item, making it a versatile addition to your menu.
Storage and Reheating
- Refrigerator Storage: Keep leftover pop tarts in an airtight container in the fridge for up to 3 days.
- Freezer Storage: For longer storage, freeze unbaked pop tarts by placing them in a single layer on a baking sheet until firm, then transfer to a freezer bag for up to 3 months.
- Best Reheating Method: Reheat in the oven at 350°F (175°C) for about 5-10 minutes to maintain crispiness. Microwaving is quicker but may result in a softer pastry.
- Preserving Texture: For best results after thawing, reheat directly from the freezer without letting them thaw first.
Common Mistakes to Avoid
- Using Warm Ingredients: Warm butter can lead to a dense crust. Ensure your butter is properly chilled.
- Skipping Refrigeration: Don’t skip the chilling step; it’s important for achieving a flaky texture.
- Filling Too Much: Adding too much filling can cause overflow during baking. Stick to about a tablespoon.
- Not Sealing Edges Properly: Incomplete sealing can lead to filling leakage, ruining the appearance and taste.
- Overbaking: Keep an eye on them as they bake; it’s better to check early than to burn.
Coffin Shaped Homemade Pop Tarts: Background & Cultural Inspiration
Coffin Shaped Homemade Pop Tarts bring together the cherished tradition of homemade pastries and the playful spirit of Halloween. Pop Tarts originated in the United States in the 1960s, crafted for convenience and flavor. The addition of Halloween-themed shapes infuses these treats with whimsy, perfect for celebrations where kids and adults enjoy themed snacks. The tradition of decorating pastries also connects to cultural practices around the world, where festive foods often incorporate playful designs to enhance seasonal joy.
Frequently Asked Questions
Can I use other types of fillings?
Yes! Feel free to experiment with different jams, nut butters, and even chocolate spread.
How do I store leftovers?
Store any leftover pop tarts in an airtight container in the refrigerator for up to 3 days.
Can I make these pop tarts in advance?
Absolutely! You can freeze the unbaked pop tarts and bake them directly from the freezer when you’re ready to enjoy.
What can I use for decoration besides icing?
Consider using melted chocolate, colorful sprinkles, or edible glitter for a festive touch.
How long do these pop tarts last in the freezer?
They can last up to 3 months in the freezer. Just make sure to store them in an airtight bag or container.
Final Thoughts
Coffin Shaped Homemade Pop Tarts are a fun and delightful addition to your Halloween festivities. With their customizable fillings and playful design, they are sure to impress your guests and create lasting memories. This recipe not only brings joy through its flavors but also excitement through its presentation. So, gather your ingredients, get creative with your fillings, and bring a touch of whimsy to your next baking adventure!
PrintCoffin Shaped Homemade Pop Tarts
These delightful coffin-shaped pop tarts are perfect for Halloween, easy to make, and customizable with your favorite fruit jam.
- Prep Time: 30 minutes
- Cook Time: 20 minutes
- Total Time: 50 minutes
- Yield: 8 pop tarts
- Category: Dessert
- Method: Baking
- Cuisine: American
- Diet: Vegetarian
Ingredients
- 1 cup all-purpose flour
- 1/4 cup unsalted butter, chilled and cubed
- 1/4 cup granulated sugar
- 1/4 teaspoon salt
- 2-3 tablespoons cold water
- 1/2 cup fruit jam or filling of choice (e.g., strawberry or blueberry)
- 1 egg (for egg wash)
- Powdered sugar (for icing, optional)
- Food coloring (for decoration, optional)
Instructions
- Prepare the dough: In a mixing bowl, combine the flour, sugar, and salt. Add the chilled butter and mix until the mixture resembles coarse crumbs.
- Form the dough: Gradually add cold water, a tablespoon at a time, until a dough forms. Wrap the dough in plastic wrap and refrigerate for 30 minutes to firm up.
- Preheat the oven: Preheat your oven to 350°F (175°C).
- Roll out the dough: On a floured surface, roll out the dough to about 1/4 inch thick. Cut it into coffin shapes using a knife or a cookie cutter.
- Add the filling: Place a tablespoon of fruit jam in the center of half of the shapes, ensuring you leave a little space around the edges.
- Seal the pop tarts: Top the jam-filled shapes with the remaining dough shapes, sealing the edges with a fork to prevent the filling from leaking during baking.
- Prepare for baking: Brush the tops of the pop tarts with the egg wash for a golden finish.
- Bake: Place the pop tarts on a baking sheet lined with parchment paper and bake for 15-20 minutes, or until they are golden brown.
- Cool and decorate: Allow the pop tarts to cool slightly before decorating with powdered sugar icing and food coloring if desired.
Notes
Use cold ingredients for a flaky texture. Don’t overwork the dough and ensure edges are sealed properly.












