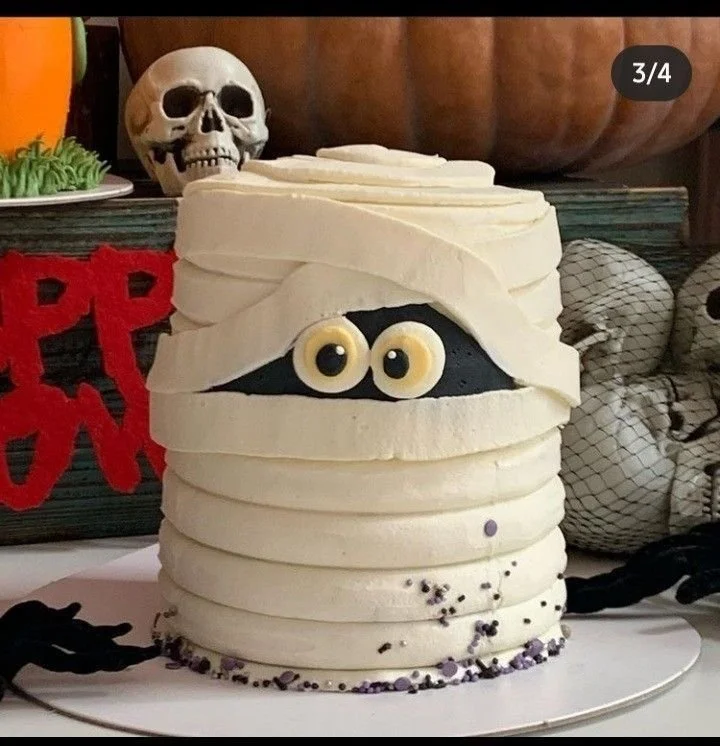
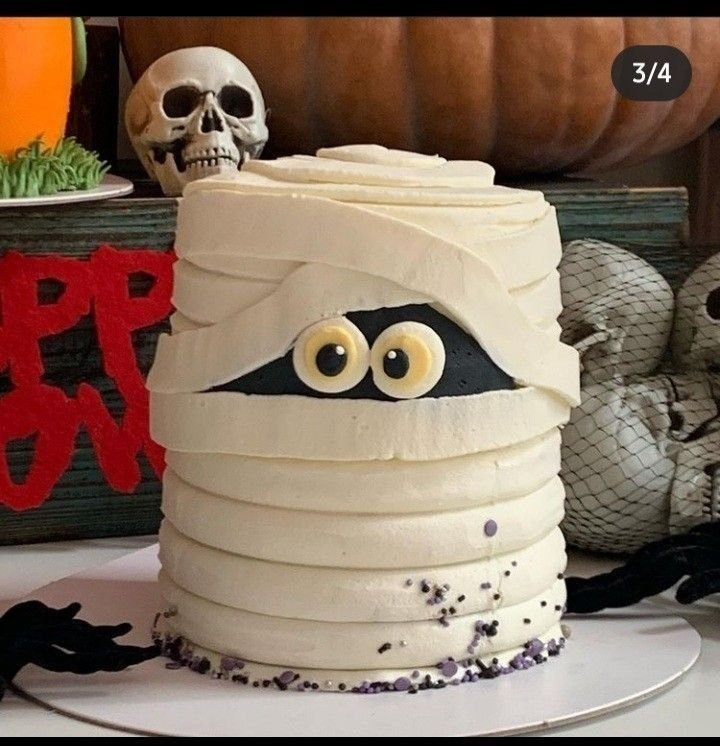
Making a Mummy Cake is a fun twist on traditional cake decorating that’s perfect for Halloween celebrations. This easy-to-follow recipe brings together simple ingredients and creative presentation, making it a hit for kids and adults alike. If you’re looking to impress at your next gathering, this Mummy Cake will not only taste delicious but also serve as a festive centerpiece.
Why You’ll Love Mummy Cake
- Fun and Creative Design: The spooky mummy appearance is sure to delight guests of all ages, making it a centerpiece for any Halloween party.
- Beginner-Friendly: Even if you’re new to baking, this recipe is straightforward and allows for creative expression without complex techniques.
- Delicious Flavor: Made with fluffy cake and creamy frosting, the taste is just as enjoyable as the presentation.
- Customizable: You can easily tweak the flavors or decorations to suit your preferences, allowing you to create a unique version of this festive cake.
- Perfect for Any Occasion: While it shines during Halloween, it’s an appealing treat for birthday parties, school events, or family gatherings too.
Recipe Overview
- Prep Time: 30 minutes
- Cook Time: 30 minutes
- Total Time: 1 hour
- Servings: 12 slices
- Difficulty Level: Easy
Ingredients You’ll Need for Mummy Cake
-
For the cake:
- 2 cups all-purpose flour
- 1 ½ cups granulated sugar
- ½ cup unsalted butter, softened
- 1 cup milk
- 3 ½ teaspoons baking powder
- 1 teaspoon vanilla extract
- ½ teaspoon salt
- 4 large eggs
-
For the frosting:
- 1 cup unsalted butter, softened
- 4 cups powdered sugar
- 2 tablespoons milk
- 1 teaspoon vanilla extract
-
For decoration:
- 2 cups white candy melts or fondant
- Mini chocolate chips, for eyes
How to Make Mummy Cake
-
Preheat the Oven:
Preheat your oven to 350°F (175°C) and grease two 9-inch round cake pans with butter or cooking spray. -
Mix Dry Ingredients:
In a large bowl, combine the flour, baking powder, and salt. Whisk them together to ensure they are evenly mixed. -
Cream Butter and Sugar:
In another mixing bowl, beat the softened butter and granulated sugar together until the mixture is light and fluffy, about 2–3 minutes. -
Add Eggs and Vanilla:
Add the eggs one at a time along with the vanilla extract, mixing well after each addition. -
Combine Mixtures:
Gradually add the dry ingredients to the butter mixture, alternating with milk. Start and end with the flour mixture, mixing until just combined. -
Bake the Cake:
Divide the batter evenly between the prepared cake pans. Bake in the preheated oven for 25-30 minutes, or until a toothpick inserted in the center comes out clean. -
Cool the Cakes:
Let the cakes cool in the pans for about 10 minutes. Then, transfer them to a wire rack to cool completely. -
Prepare the Frosting:
In a separate bowl, beat the softened butter until creamy. Gradually add the powdered sugar, milk, and vanilla extract. Beat until smooth and fluffy. -
Frost the Cakes:
Place one cooled cake layer on a serving platter and spread frosting on top. Add the second layer and frost the top and sides of the entire cake. -
Mummy Decoration:
Melt the white candy melts according to package instructions. Drizzle the melted candy over the cake to create the mummy wrap effect. Use mini chocolate chips to create the eyes.
Tips for Success
- Use Room Temperature Ingredients: Make sure your eggs and butter are at room temperature for better mixing and a fluffier cake.
- Don’t Overmix the Batter: Mix just until combined to keep the cake tender and light.
- Let Cakes Cool Completely: This prevents the frosting from melting and helps maintain a clean, neat appearance.
- Adjust Candy Melt Consistency: If your melted candy is too thick, add a small amount of vegetable oil to reach a drizzly consistency.
- Practice Mummy Wrapping: Prior to applying the candy melts, practice drizzling on wax paper to get the hang of it.
Easy Variations
- Flavor Twist: Add spices like cinnamon or nutmeg for a seasonal flavor profile.
- Chocolate Mummy Cake: Replace some of the flour with cocoa powder to make a chocolate version.
- Vegan Option: Substitute the eggs with a flaxseed mixture and use plant-based milk and butter for a vegan cake.
- Additional Fillings: Add a layer of jam or pudding between cake layers for an extra flavor boost.
- Spooky Add-Ons: Garnish with gummy worms or edible glitter for a more festive look.
What to Serve with Mummy Cake
- Ice Cream: A scoop of vanilla or chocolate ice cream complements the cake’s sweetness.
- Fruit Salad: Fresh fruit adds a refreshing contrast to the rich cake.
- Hot Cocoa: Serve warm cocoa for a cozy drink pairing on chilly Halloween nights.
- Spiced Apple Cider: This warm beverage enhances the autumnal theme and balances sweetness.
- Cheese Board: A selection of cheeses gives a savory counterpoint to the cake’s sweetness.
Storage and Reheating
- Refrigerator Storage: Store the Mummy Cake in an airtight container in the refrigerator for up to 4 days.
- Freezer Storage: Wrap slices in plastic wrap and freeze for up to 3 months. Thaw overnight in the refrigerator before serving.
- Reheating: If you prefer warm cake, microwave a slice for about 10-15 seconds, careful not to overheat.
- Preserve Texture: To maintain frosting texture, avoid refrigerating if possible; keep it in a cool place instead.
Common Mistakes to Avoid
- Underbaking the Cake: Make sure to bake until a toothpick inserted into the center comes out clean to avoid a dense texture.
- Rushing the Cooling Process: Frosting on a warm cake can melt and create a messy look.
- Using Cold Ingredients: Starting with cold eggs or butter can lead to uneven mixing and affect your cake’s rise.
- Drizzling Candy Too Thick: If it’s too thick, it won’t create the desired wrap effect.
Mummy Cake: Background & Cultural Inspiration
The Mummy Cake is a playful take on the classic Halloween theme, blending traditional cake design with a fun, spooky aesthetic. Rooted in Western Halloween traditions, it leverages the holiday’s focus on playful scares and treats. The use of white candy melts or fondant emulates the wrappings of mummies found in Egyptian mythology, connecting cultural stories to modern baking. This recipe not only captures the spirit of Halloween but also encourages creativity and imagination in the kitchen, making it a popular choice for celebrations across the globe.
Frequently Asked Questions
Can I make this cake ahead of time?
Yes, you can bake the cakes a day in advance and store them in the refrigerator until you’re ready to frost and decorate them.
What can I substitute for eggs?
For egg substitutes, you can use a flaxseed mixture or applesauce. About 1/4 cup of applesauce works for each egg.
How can I make the cake more moist?
Adding a bit of yogurt or sour cream to the batter can enhance moisture and flavor.
Can I use a different frosting?
Certainly! Cream cheese frosting or ganache can also work well with this cake, adding a different flavor profile.
What kind of cake pans should I use?
9-inch round cake pans are recommended, but you can use other shapes as long as you adjust the baking time accordingly.
Final Thoughts
Mummy Cake is a delightful way to celebrate Halloween with a sweet twist. It’s simple enough for beginner bakers and sure to impress family and friends alike. Offering both eye-catching presentation and delicious flavor, this cake is worth making for any festive event. Give it a try and enjoy creating edible art in your kitchen!
PrintMummy Cake
A fun and creative twist on traditional cake decorating that’s perfect for Halloween celebrations.
- Prep Time: 30 minutes
- Cook Time: 30 minutes
- Total Time: 60 minutes
- Yield: 12 slices
- Category: Dessert
- Method: Baking
- Cuisine: American
- Diet: Vegetarian
Ingredients
- 2 cups all-purpose flour
- 1 ½ cups granulated sugar
- ½ cup unsalted butter, softened
- 1 cup milk
- 3 ½ teaspoons baking powder
- 1 teaspoon vanilla extract
- ½ teaspoon salt
- 4 large eggs
- 1 cup unsalted butter, softened (for frosting)
- 4 cups powdered sugar
- 2 tablespoons milk (for frosting)
- 1 teaspoon vanilla extract (for frosting)
- 2 cups white candy melts or fondant (for decoration)
- Mini chocolate chips, for eyes
Instructions
- Preheat your oven to 350°F (175°C) and grease two 9-inch round cake pans with butter or cooking spray.
- Mix the flour, baking powder, and salt in a large bowl and whisk them together to ensure even mixing.
- Cream the softened butter and granulated sugar in another mixing bowl until light and fluffy, about 2–3 minutes.
- Add the eggs one at a time along with the vanilla extract, mixing well after each addition.
- Combine the dry ingredients with the butter mixture, alternating with the milk, starting and ending with the flour mixture.
- Bake the batter evenly between the prepared pans for 25-30 minutes, or until a toothpick inserted comes out clean.
- Cool the cakes in the pans for about 10 minutes before transferring them to a wire rack to cool completely.
- Prepare the frosting by beating the softened butter until creamy, adding powdered sugar, milk, and vanilla extract, and beating until smooth.
- Frost the first cooled cake layer, placing the second layer on top and frosting the top and sides of the entire cake.
- Melt the white candy melts and drizzle over the cake to create a mummy wrap effect, adding mini chocolate chips for eyes.
Notes
Make sure to use room temperature ingredients for better mixing. Let cakes cool completely to prevent frosting from melting.












