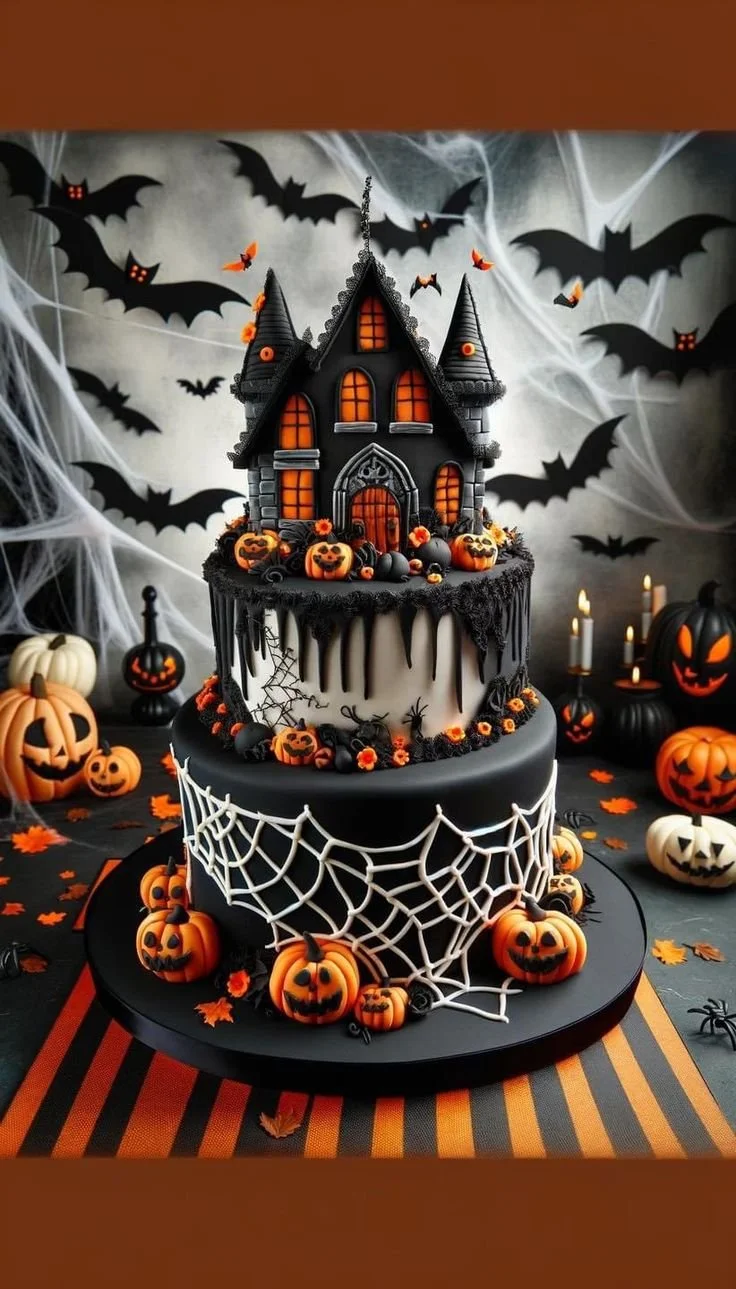
Black and orange Halloween Cake is a fun and festive treat that adds a delightful touch to any Halloween celebration. This cake combines rich flavors with vibrant colors, making it both visually stunning and delicious. Perfect for parties, family gatherings, or as a special Halloween dessert, this recipe will surely impress your guests and create lasting memories.
Why You’ll Love Black and Orange Halloween Cake
- Visually Striking: The bold black and orange layers create a show-stopping centerpiece for any Halloween table.
- Delicious Flavor: A moist and flavorful cake that balances sweetness with a hint of spiciness, making it irresistible to all.
- Fun for All Ages: Great for kids and adults alike, this cake is a fantastic way to get into the Halloween spirit.
- Easy to Customize: Whether you want to swap flavors, adjust the frosting, or add toppings, this recipe is simple to modify.
- Perfect for Occasions: Ideal for Halloween parties, birthdays, or even as a treat for trick-or-treaters at home.
Recipe Overview
- Prep Time: 30 minutes
- Cook Time: 30 minutes
- Total Time: 1 hour
- Servings: 12
- Difficulty Level: Medium
Ingredients You’ll Need for Black and Orange Halloween Cake
For the Cake:
- 2 cups all-purpose flour
- 1 ½ cups granulated sugar
- 1 cup unsweetened cocoa powder (for the black layer)
- 1 teaspoon baking powder
- 1 teaspoon baking soda
- ½ teaspoon salt
- 1 cup buttermilk (you can substitute with regular milk)
- ½ cup vegetable oil
- 2 large eggs
- 1 teaspoon vanilla extract
- 1 cup orange food coloring (for the orange layer)
For the Frosting:
- 1 cup unsalted butter, softened
- 4 cups powdered sugar
- 1/2 cup cocoa powder (optional, if making black frosting)
- 1 teaspoon vanilla extract
- 2-4 tablespoons milk (to achieve desired consistency)
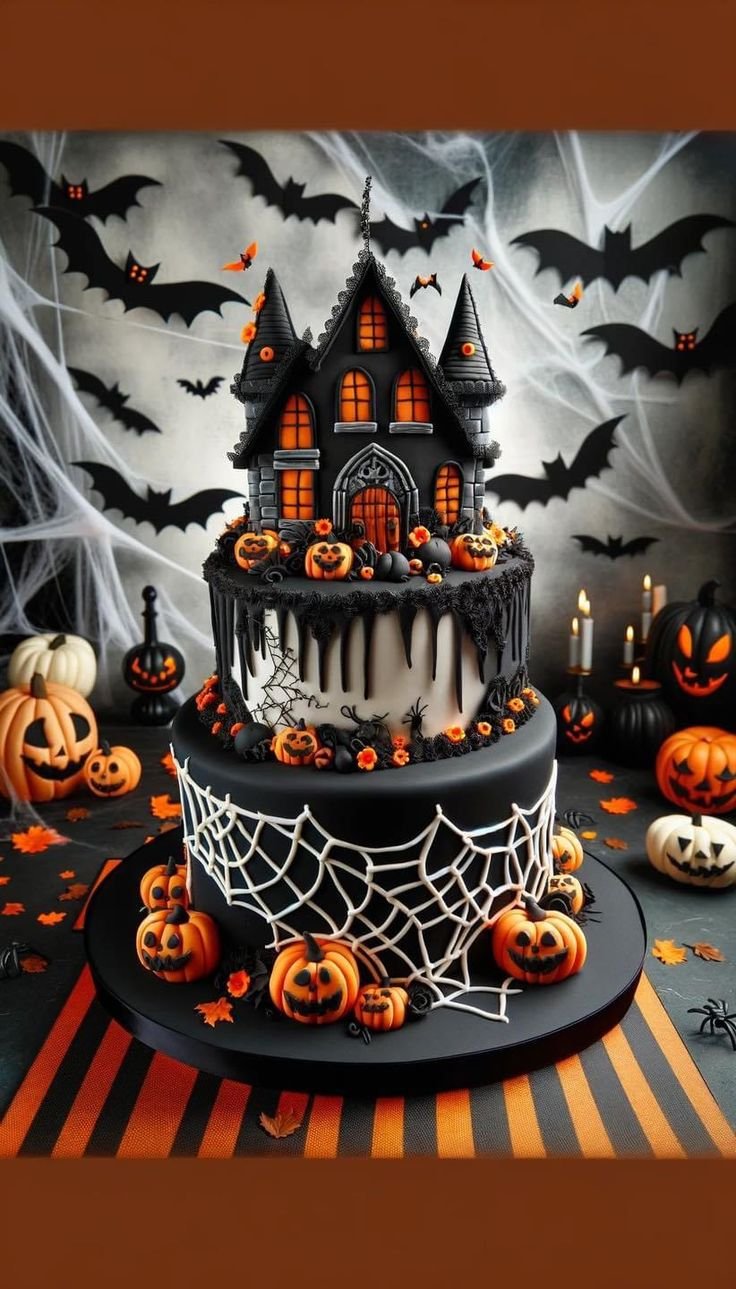
How to Make Black and Orange Halloween Cake
-
Preheat the Oven:
Preheat your oven to 350°F (175°C). Grease and flour two round cake pans (9-inch). -
Mix Dry Ingredients:
In a large bowl, whisk together the flour, sugar, cocoa powder, baking powder, baking soda, and salt until well combined. -
Combine Wet Ingredients:
In another bowl, mix the buttermilk, vegetable oil, eggs, and vanilla extract. Stir until fully combined. -
Combine Mixtures:
Gradually pour the wet ingredient mixture into the dry ingredients, mixing gently until just blended. Be careful not to overmix. -
Divide and Color:
Split the batter into two separate bowls. Leave one half plain for the black layer. Add the orange food coloring to the second bowl, mixing until you achieve a vibrant hue. -
Pour into Pans:
Pour half of the black batter into one prepared pan and half of the orange batter into the other. Use a spatula to smooth the tops. -
Bake:
Bake in the preheated oven for 25-30 minutes, or until a toothpick inserted in the center comes out clean. Let cool in the pans for 10 minutes before transferring cakes to wire racks. -
Prepare the Frosting:
In a large bowl, beat the softened butter until creamy. Gradually add powdered sugar and cocoa powder (for black frosting) or keep it plain for orange frosting, alternating with milk until you reach the desired spreadable consistency. -
Assemble the Cake:
Once the cakes are completely cool, place one layer on a serving plate. Spread a layer of frosting on top, then add the second layer. Frost the top and sides of the cake as desired. -
Decorate:
You can decorate with Halloween-themed sprinkles, edible eyes, or any festive decorations you like.
Tips for Success
- Ensure Even Layers: When pouring batter, use a kitchen scale for precision, aiming for equal weight in both pans for uniform layers.
- Cool Completely: Allow cakes to cool completely before frosting. This prevents the frosting from melting and sliding off.
- Check Oven Temperature: Ovens may vary; use a thermometer to ensure accurate temperature for perfect baking.
- Frosting Edges: For a smoother finish, use a bench scraper to gently smooth the edges of the frosting.
Easy Variations
- Spice Variations: Add a teaspoon of pumpkin spice to the batter for an autumn flavor twist.
- Fruit Add-Ins: For added moisture, fold in a cup of pureed pumpkin into the batter and adjust the flour slightly.
- Different Frosting Flavors: Use cream cheese frosting instead of buttercream for a tangy taste.
- Cupcake Version: Pour the batter into cupcake liners for individual servings—just reduce the baking time to about 20 minutes.
What to Serve with Black and Orange Halloween Cake
- Spooky Cupcakes: Serve alongside Halloween-themed cupcakes for a festive dessert table.
- Pumpkin Spice Latte: The warm, spiced drink complements the flavors of the cake beautifully.
- Apple Cider: A refreshing drink that pairs well with the rich chocolate and sweet orange layers.
- Ghoulish Snacks: Consider serving with fun, themed snacks like ghost-shaped cookies for an extra festive touch.
Storage and Reheating
- Refrigerator Storage: Store any leftover cake in an airtight container in the fridge for up to 5 days.
- Freezer Storage: Wrapped tightly with plastic wrap, this cake can be frozen for up to 3 months. Thaw in the refrigerator before serving.
- Reheating: For serving, warm individual slices in the microwave for about 10-15 seconds to refresh the cake’s moisture.
- Meal Prep Note: Bake and frost the cake a day in advance to save time on the day of your event.
Common Mistakes to Avoid
- Underbaking or Overbaking: Make sure to test for doneness with a toothpick. Adjust baking time according to your oven.
- Frosting Too Soft: If your frosting is too runny, add more powdered sugar gradually to thicken it.
- Skipping Cooling Time: Avoid frosting warm cakes, as it can melt the frosting and create a mess.
- Using Cold Ingredients: Ensure your ingredients like butter and eggs are at room temperature for better mixing.
Black and Orange Halloween Cake: Background & Cultural Inspiration
The tradition of celebrating Halloween dates back centuries, rooted in ancient Celtic festivals and later influenced by Christian customs. Cakes and sweets have always played a pivotal role in festivities, symbolizing abundance and community. The use of black and orange – colors associated with Halloween – reflects the season’s harvest and festivities. This cake embodies the spirit of Halloween parties, inviting fun and creativity into the kitchen.
Frequently Asked Questions
Can I make this cake gluten-free?
Yes! Substitute the all-purpose flour with a gluten-free baking blend.
How far in advance can I make the cake?
You can bake and frost the cake up to 1 day in advance. Store covered in the fridge until ready to serve.
What if I don’t have buttermilk?
You can make a quick substitute by mixing 1 cup of milk with a tablespoon of vinegar or lemon juice. Let it sit for 5 minutes before using.
Can I use other food colorings?
Absolutely! Gel food colors can provide vibrant results without adding too much liquid to your batter.
How can I make this cake dairy-free?
Use non-dairy milk and a dairy-free butter for the frosting, and be sure to check your ingredients for any dairy-related components.
Final Thoughts
Black and Orange Halloween Cake is a wonderful way to celebrate the festive season, merging delicious flavors with striking visual appeal. Whether for a holiday gathering or a simple family treat, this cake brings joy and creativity to the table. Give it a try, and enjoy the delightful moments it brings to your Halloween celebration!
PrintBlack and Orange Halloween Cake
A fun and festive Black and Orange Halloween Cake that combines rich flavors with vibrant colors, perfect for any Halloween celebration.
- Prep Time: 30 minutes
- Cook Time: 30 minutes
- Total Time: 60 minutes
- Yield: 12 servings
- Category: Dessert
- Method: Baking
- Cuisine: American
- Diet: Vegetarian
Ingredients
- 2 cups all-purpose flour
- 1 ½ cups granulated sugar
- 1 cup unsweetened cocoa powder (for the black layer)
- 1 teaspoon baking powder
- 1 teaspoon baking soda
- ½ teaspoon salt
- 1 cup buttermilk (you can substitute with regular milk)
- ½ cup vegetable oil
- 2 large eggs
- 1 teaspoon vanilla extract
- 1 cup orange food coloring (for the orange layer)
- 1 cup unsalted butter, softened
- 4 cups powdered sugar
- ½ cup cocoa powder (optional, if making black frosting)
- 1 teaspoon vanilla extract
- 2-4 tablespoons milk (to achieve desired consistency)
Instructions
- Preheat your oven to 350°F (175°C). Grease and flour two round cake pans (9-inch).
- Mix together the flour, sugar, cocoa powder, baking powder, baking soda, and salt until well combined.
- Combine the buttermilk, vegetable oil, eggs, and vanilla extract in another bowl. Stir until fully combined.
- Combine the wet ingredient mixture into the dry ingredients, mixing gently until just blended.
- Divide the batter into two bowls. Leave one half plain for the black layer and mix orange food coloring into the other bowl.
- Pour half of the black batter into one prepared pan and half of the orange batter into the other.
- Bake for 25-30 minutes, or until a toothpick inserted in the center comes out clean. Let cool for 10 minutes in the pans.
- Prepare the frosting by beating the softened butter until creamy, then adding powdered sugar and cocoa powder (if desired), alternating with milk.
- Assemble the cooled cakes by layering them with frosting between and on top.
- Decorate with Halloween-themed sprinkles or any festive decorations you like.
Notes
For a smoother finish, use a bench scraper to smooth the edges of the frosting. Ensure cakes cool completely before frosting.












