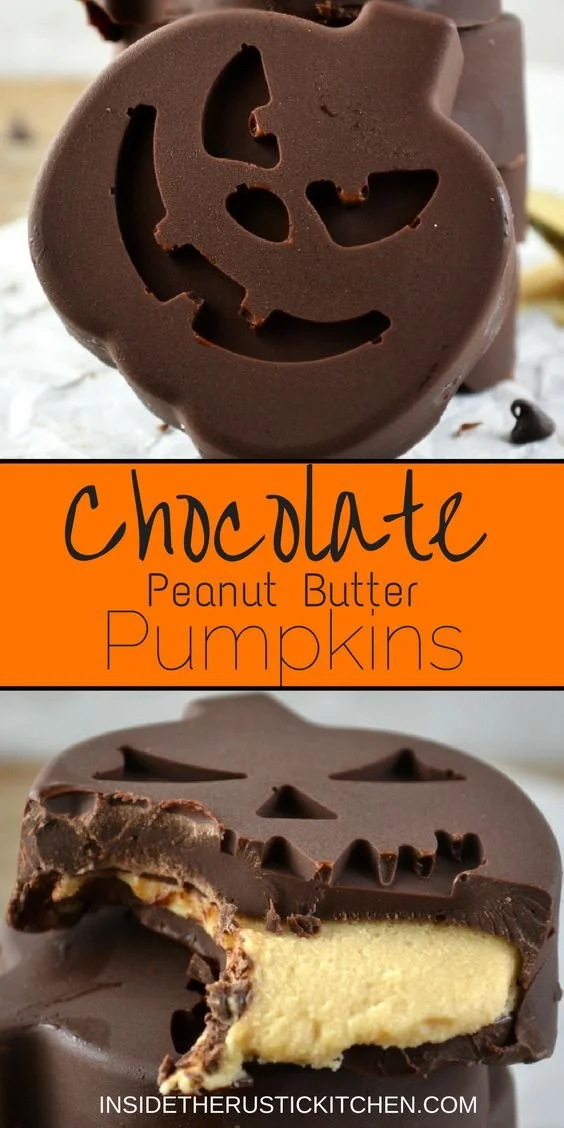
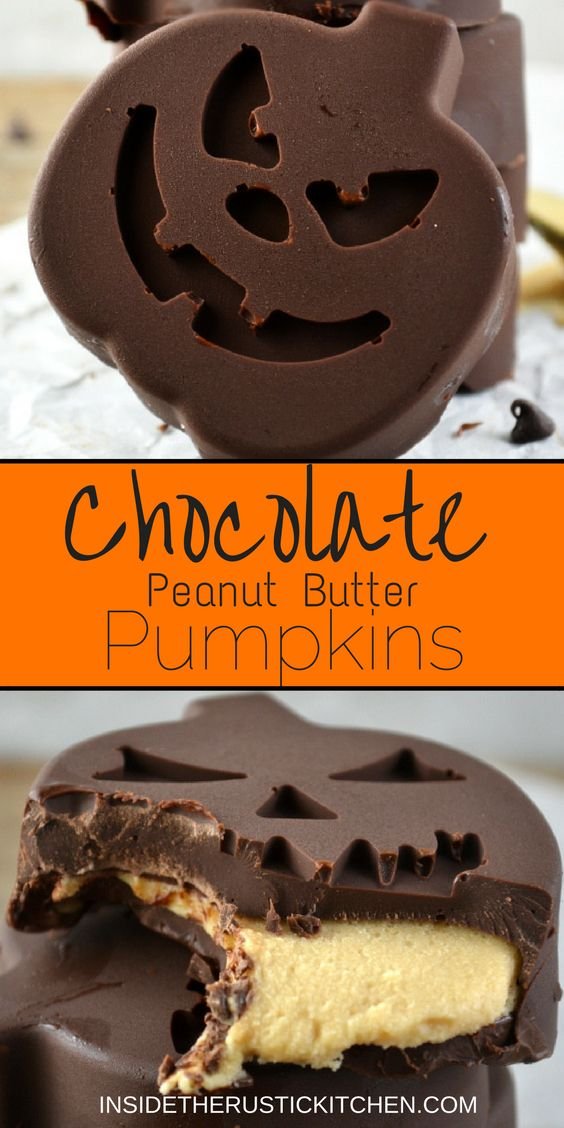
Chocolate Peanut Butter Pumpkins are a delightful treat that combines rich chocolate with creamy peanut butter, all shaped into festive pumpkin forms. This easy recipe is perfect for gatherings or as a fun family activity, making it a great way to celebrate the autumn season or Halloween with something special and homemade.
Why You’ll Love Chocolate Peanut Butter Pumpkins
- Simple to Make: With only three main ingredients and straightforward steps, even beginner cooks can whip these up in no time.
- No-Bake Delight: These treats require minimal cooking, saving you from heating up the kitchen and allowing you to enjoy them quickly.
- Customizable: You can easily tailor the flavors or shapes to suit any occasion, making them versatile for different celebrations.
- Perfect for Gifting: Wrapped nicely, these pumpkin-shaped chocolates make thoughtful, homemade gifts that stand out.
- Crowd-Pleaser: The combination of chocolate and peanut butter appeals to both kids and adults, ensuring they’re a hit at any event.
Recipe Overview
- Prep Time: 30 minutes
- Cook Time: 0 minutes (melt time only)
- Total Time: 30 minutes + chilling time
- Servings: 12 pieces
- Difficulty Level: Easy
Ingredients You’ll Need for Chocolate Peanut Butter Pumpkins
- 300 g dark or milk chocolate (cut into small chunks): Use dark chocolate for a richer flavor or milk chocolate for a sweeter treat.
- 100 g peanut butter: Creamy peanut butter works best for a smooth filling, but crunchy can add a fun texture.
- 50 g icing (powder) sugar: This adds sweetness and helps bind the filling.
- 1 pinch smoked salt: Enhances the flavors. Regular salt can be used if you don’t have smoked.
How to Make Chocolate Peanut Butter Pumpkins
-
Melt Chocolate: Fill a pot halfway with water and bring it to a simmer over low/medium heat. Place a heatproof bowl on top, ensuring it doesn’t touch the water. Add 150 g of chocolate to the bowl and stir occasionally until melted. Remove from heat.
-
Create Chocolate Shells: Spoon equal amounts of melted chocolate (around 1 tablespoon each) into pumpkin molds. Use the back of a spoon to spread the chocolate up the sides of the molds. Place them in the freezer for 15 minutes to set.
-
Prepare the Filling: While the chocolate sets, combine the peanut butter, icing sugar, and smoked salt in a bowl. Mix until smooth and well incorporated.
-
Fill the Molds: Remove the molds from the freezer. Spoon about 1 teaspoon of the peanut butter mixture into each mold. Smooth out the top as evenly as possible, then return the molds to the freezer for another 15 minutes.
-
Top with Chocolate: Melt the remaining 150 g of chocolate using the same method. After 15 minutes, take the molds out and cover the peanut butter layer with the melted chocolate. Tap the molds gently on the countertop to ensure they are level. Freeze for 15 minutes until fully set.
-
Enjoy: Once set, pop the Chocolate Peanut Butter Pumpkins out of the molds. Serve immediately or let them come to room temperature.
Tips for Success
- Use Quality Chocolate: A good-quality chocolate will enhance the flavor significantly, making your treats taste gourmet.
- Work Quickly: Chocolate can set quickly, so try to work efficiently while molding and filling to avoid it hardening prematurely.
- Chill Between Steps: Ensure proper chilling between each step to maintain the structure and prevent leaks.
- Substitute Nut Butters: Feel free to use almond or cashew butter if preferred for a different flavor profile.
- Molds Matter: Silicone molds work best as they help release the chocolates easily without breaking.
Easy Variations
- Add Sprinkles: For a more festive touch, top the final layer of chocolate with colorful sprinkles before it sets.
- Flavored Chocolate: Try using white chocolate or adding flavor extracts (like vanilla or peppermint) to the chocolate before melting.
- Mini Shapes: Use different silicone molds (like hearts or stars) to create variations for various occasions.
- Spicy Twist: Mix in a pinch of cayenne pepper or cinnamon with the peanut butter for a warm spice kick.
- Dairy-Free Option: Substitute with dairy-free chocolate and a nut butter of your choice for a vegan-friendly version.
What to Serve with Chocolate Peanut Butter Pumpkins
- Hot Cocoa: A warming beverage that complements the sweet and rich flavors of these chocolates perfectly.
- Coffee: The bitterness of coffee contrasts well with the sweetness, making it a great afternoon treat.
- Ice Cream: Serve alongside vanilla or chocolate ice cream for a decadent dessert combination.
- Fruit: Fresh fruit like strawberries or apple slices adds a refreshing note that balances the richness.
- Cheese Board: Incorporate these treats into a cheese platter for an exciting dessert option.
Storage and Reheating
- Refrigerator Storage: Store Chocolate Peanut Butter Pumpkins in an airtight container in the fridge for up to 5 days. This helps maintain their freshness and flavor.
- Freezer Storage: They can also be frozen for up to 2 months. Just ensure they are well-wrapped to prevent freezer burn.
- Best Reheating Method: If removing from the freezer, let them sit at room temperature before indulging for the best texture.
- Preserve Texture: Avoid reheating in the microwave to maintain the shape and texture; enjoy cold or slightly warmed.
Common Mistakes to Avoid
- Not Melting Slowly: Melting chocolate too quickly can result in burning or seizing. Use a gentle heat.
- Skipping Chilling Time: Each chilling step is crucial for preventing your treats from falling apart.
- Overfilling Molds: Be careful not to overfill the molds, as this can cause messy overflow.
- Using Low-Quality Ingredients: Cheap chocolate or peanut butter can significantly detract from your final product.
- Not Mixing Filling Well: Ensure that the peanut butter and sugar are blended thoroughly to avoid a gritty texture.
Chocolate Peanut Butter Pumpkins: Background & Cultural Inspiration
Chocolate and peanut butter create a harmonious pairing celebrated in many dessert recipes, especially in the United States. This delightful treat echoes the seasonal festivities around Halloween, where creativity in food takes center stage. The pumpkin shape adds a whimsical, playful aspect that appeals to both children and adults alike. Making these treats can also reflect the tradition of homemade sweets during the holidays, bringing family and friends together for a fun culinary project. The versatility of chocolate and peanut butter is evident in various desserts worldwide, but these pumpkins offer a unique seasonal twist.
Frequently Asked Questions
Can I use alternative nut butters?
Yes, you can substitute peanut butter with any nut butter like almond or sun butter, though it will alter the flavor profile slightly.
How long can I store these treats?
Chocolate Peanut Butter Pumpkins can be stored in the refrigerator for up to 5 days or frozen for up to 2 months.
What if I don’t have pumpkin molds?
You can use any silicone mold, or even mini cupcake liners or a baking tray to shape them.
Can I make these ahead of time?
Absolutely! These treats are perfect for making ahead and storing for later enjoyment.
Is this recipe gluten-free?
Yes, as long as the chocolate and peanut butter you use do not contain gluten, these treats are gluten-free.
Final Thoughts
Chocolate Peanut Butter Pumpkins are a delightful way to indulge in the cozy flavors of chocolate and peanut butter in a fun, festive shape. With simple ingredients and easy steps, this recipe invites you to create something special that everyone will love. Whether for a gathering or a treat for yourself, these little delights are worth the effort. Give them a try, and enjoy the smiles they bring!
PrintChocolate Peanut Butter Pumpkins
Delightful no-bake treats combining rich chocolate and creamy peanut butter shaped into festive pumpkins.
- Prep Time: 30 minutes
- Cook Time: 0 minutes
- Total Time: 30 minutes + 30 minutes chilling
- Yield: 12 pieces
- Category: Dessert
- Method: No-Bake
- Cuisine: American
- Diet: Vegetarian
Ingredients
- 300 g dark or milk chocolate (cut into small chunks)
- 100 g creamy peanut butter
- 50 g icing (powder) sugar
- 1 pinch smoked salt
Instructions
- Melt Chocolate: Fill a pot halfway with water and bring it to a simmer over low/medium heat. Place a heatproof bowl on top, ensuring it doesn’t touch the water. Add 150 g of chocolate to the bowl and stir occasionally until melted. Remove from heat.
- Create Chocolate Shells: Spoon equal amounts of melted chocolate (around 1 tablespoon each) into pumpkin molds. Use the back of a spoon to spread the chocolate up the sides of the molds. Place them in the freezer for 15 minutes to set.
- Prepare the Filling: While the chocolate sets, combine the peanut butter, icing sugar, and smoked salt in a bowl. Mix until smooth and well incorporated.
- Fill the Molds: Remove the molds from the freezer. Spoon about 1 teaspoon of the peanut butter mixture into each mold. Smooth out the top as evenly as possible, then return the molds to the freezer for another 15 minutes.
- Top with Chocolate: Melt the remaining 150 g of chocolate using the same method. After 15 minutes, take the molds out and cover the peanut butter layer with the melted chocolate. Tap the molds gently on the countertop to ensure they are level. Freeze for 15 minutes until fully set.
- Enjoy: Once set, pop the Chocolate Peanut Butter Pumpkins out of the molds. Serve immediately or let them come to room temperature.
Notes
Use quality chocolate for the best flavor. Work quickly while molding and filling to avoid chocolate hardening prematurely.












