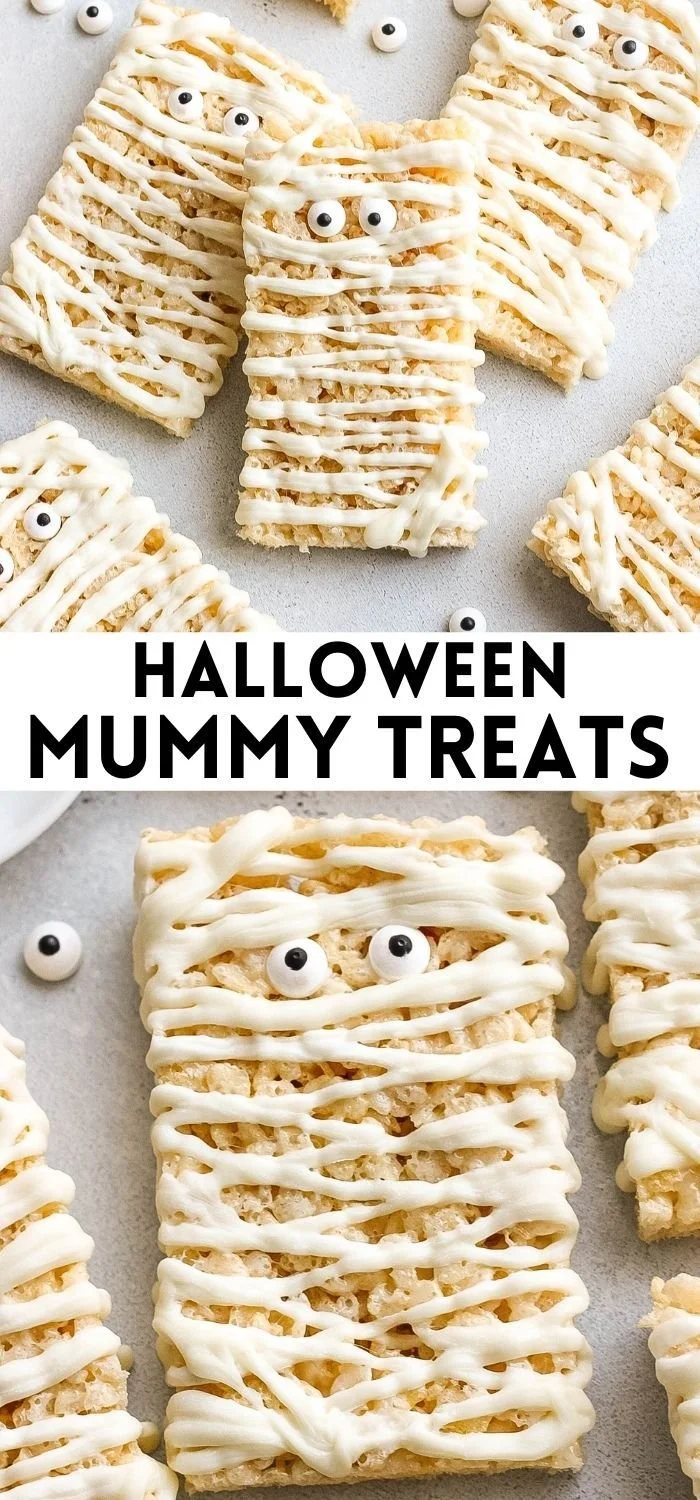
Making Halloween Mummy Treats is an enjoyable way to embrace the spirit of the season. These delightful snacks are not only visually fun but also incredibly easy to make, making them perfect for beginner cooks. With a simple set of ingredients and quick preparation, you’ll have a Halloween-themed treat that everyone will love.
Why You’ll Love Halloween Mummy Treats
- Quick and Easy: This recipe comes together in just a few steps, making it an ideal choice for busy schedules or impromptu Halloween parties.
- Kid-Friendly Fun: Perfect for crafting with kids, they can help with shaping and decorating, adding to the excitement leading up to Halloween.
- Customizable: You can include a variety of decorations beyond candy eyes, allowing for creativity and personal touches.
- No-Bake Recipe: With minimal cooking involved, you can whip these up in no time without heating up the kitchen.
- Perfect for Parties: They make charming and creepy snacks that are sure to impress at any Halloween gathering.
Recipe Overview
- Prep Time: 10 minutes
- Cook Time: 5 minutes
- Total Time: 15 minutes
- Servings: 12 servings
- Difficulty Level: Easy
Ingredients You’ll Need for Halloween Mummy Treats
- 6 cups Rice Krispies cereal
- 1 package (10 oz) marshmallows
- 3 tablespoons butter
- White chocolate (for drizzling)
- Candy eyes (for decoration)
Ingredient Notes
- Rice Krispies Cereal: Provides the crunch for these treats; no substitutions are necessary.
- Marshmallows: Use large marshmallows for a better melt; mini marshmallows can also work, but amounts may vary.
- Butter: Helps in melting and binding the mixture; consider using unsalted butter for more control over flavor.
- White Chocolate: Melting wafers work well; you can substitute with dark or milk chocolate if preferred.
- Candy Eyes: A fun decorative element; consider using other themed sprinkles or chocolates for variety.
How to Make Halloween Mummy Treats
-
Melt the Butter
In a large saucepan, melt the butter over low heat. This helps the butter to melt smoothly without burning. -
Melt the Marshmallows
Add the marshmallows to the melted butter and stir continuously until the mixture is completely melted and smooth. Remove the pan from heat immediately to prevent overheating. -
Combine with Cereal
Add the Rice Krispies cereal to the marshmallow mixture. Stir until the cereal is well-coated and evenly mixed. -
Press into Pan
Grease a 9×13 inch pan and press the mixture firmly into the pan using a spatula or your hands. Let it cool for about 10 minutes. -
Cut into Rectangles
Once cooled, cut the mixture into rectangular pieces (or mummy shapes if you’re feeling creative). -
Melt and Drizzle White Chocolate
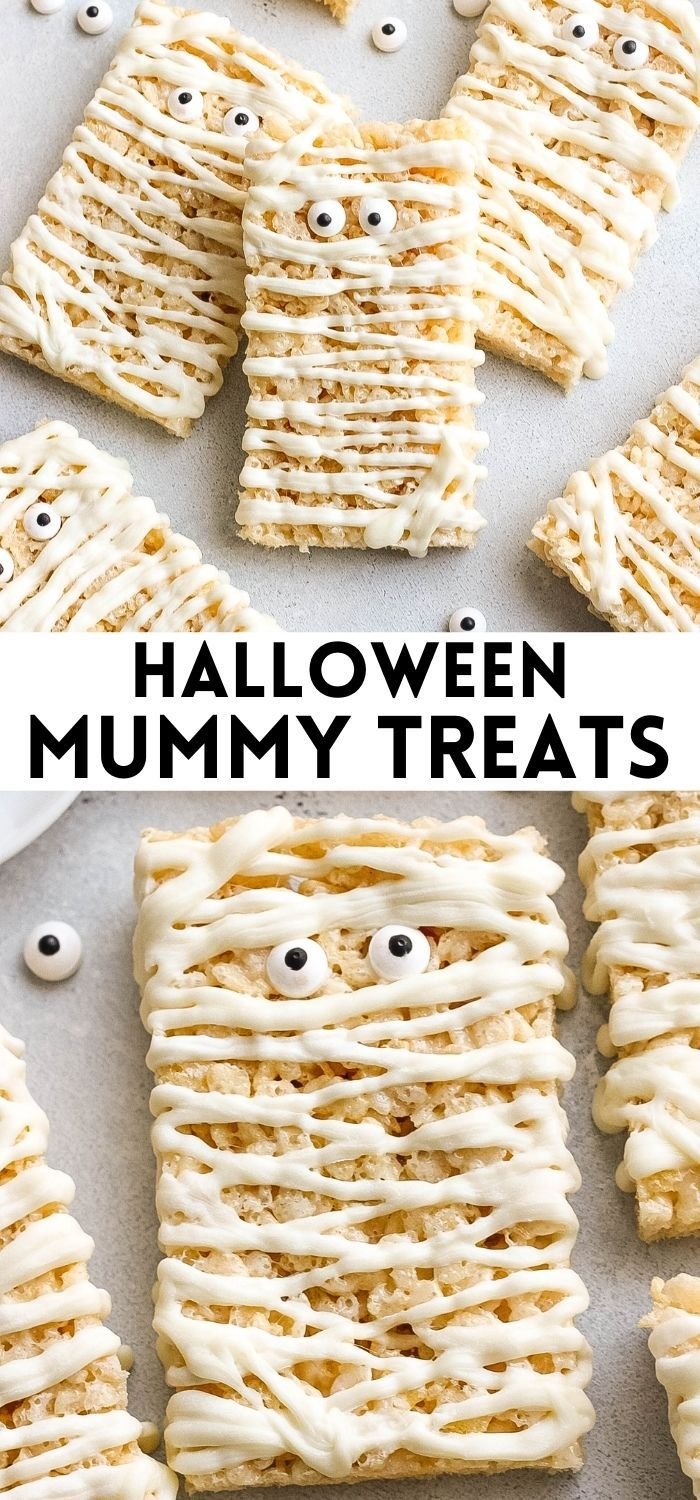
In a microwave-safe bowl, melt white chocolate according to package instructions. Drizzle the melted chocolate over the cut treats to create a mummy wrap effect. -
Add Candy Eyes
While the chocolate is still wet, attach two candy eyes to each treat. Allow the chocolate to set completely before serving.
Tips for Success
- Stickiness Control: If the mixture is too sticky to work with, lightly grease your hands or use damp hands when pressing it into the pan.
- Even Melting: Stir the marshmallows frequently while melting to ensure even consistency; this will prevent clumping.
- Chill Option: If you’re pressed for time, placing the pan in the fridge for a few minutes can help speed up the cooling process.
- Uniform Shapes: For neat rectangles, use a sharp knife and clean it between cuts to remove excess marshmallow residue.
Easy Variations
- Chocolate Drizzle: Swap white chocolate for milk or dark chocolate for a different flavor.
- Rainbow Mummies: Add colorful sprinkles to the melted chocolate before it sets for a festive flair.
- Nut Butter Addition: Mix in a tablespoon or two of peanut butter or almond butter for added flavor and creaminess.
- Fruit Add-Ins: Incorporate mini chocolate chips or dried fruit into the mixture for an extra treat.
- Halloween Themed Sprinkles: Place spooky sprinkles on top for added Halloween fun.
What to Serve with Halloween Mummy Treats
- Hot Apple Cider: This warm drink complements the sweetness of the treats and is perfect for the season.
- Pumpkin Spice Cookies: For a double dose of Halloween flavors, serve alongside these spiced goodies.
- Ghostly Cupcakes: Keep the spooky theme going with decorated cupcakes; they make a vibrant pairing.
- Mummy Dogs: These are fun, baked hot dogs wrapped in crescent dough, adding variety to your snack table.
- Caramel Apples: A classic autumn treat that pairs well with the sweetness of Halloween Mummy Treats.
Storage and Reheating
- Refrigerator Storage: Store in an airtight container for up to a week. This helps keep them fresh while maintaining texture.
- Freezer Storage: You can freeze them for up to 3 months. Wrap each treat individually in plastic wrap and place them in a freezer bag.
- Best Reheating Method: There’s no need to reheat; serve them chilled or at room temperature. If they become hard, let them sit at room temperature for a few minutes before serving.
- Meal Prep Note: These treats are great for making ahead of time, allowing you to focus on other Halloween preparations.
Common Mistakes to Avoid
- Overheating Marshmallows: Melting marshmallows too long can alter their texture; keep the heat low and stir consistently.
- Not Packing the Mixture: Failing to press the mixture firmly into the pan will result in crumbly treats when cut.
- Skipping the Greasing Step: Not greasing the pan can lead to sticking, making it difficult to remove the treats later.
- Adding Too Much Cereal: Stick to the 6 cups for optimal texture; adding more can make the treats dry and not hold together well.
Halloween Mummy Treats: Background & Cultural Inspiration
Halloween Mummy Treats are a playful take on the traditional Rice Krispies treat but elevate them with festive decorations to reflect the Halloween spirit. The concept of mummies, often depicted as wrapped in bandages, fits seamlessly into Halloween themes that focus on fun scares and treats. Rice Krispies treats have a long-standing appeal, cherished for their ease of preparation and nostalgic flavors. Integrating the spooky mummy aspect captures the essence of Halloween, inviting creativity and joy to the kitchen. As a result, these treats have become a favorite among families, merging culinary delight with seasonal festivities.
Frequently Asked Questions
Can I make these treats in advance?
Absolutely! These treats store well in an airtight container, making them perfect for preparing ahead of parties.
What can I use instead of Rice Krispies?
You can use any puffed rice cereal or even gluten-free options, though the texture may slightly vary.
How should I store leftovers?
Keep them in an airtight container at room temperature for up to a week, or refrigerate to extend freshness.
Can I freeze Halloween Mummy Treats?
Yes, they freeze well for up to three months. Ensure they are wrapped tightly to avoid freezer burn.
What if I don’t have candy eyes?
You can use mini chocolate chips, edible glitter, or even small pieces of fruit for decoration.
Final Thoughts
Halloween Mummy Treats are a fun, easy, and delightful way to celebrate the season. Their crispy, sweet texture combined with the festive decorations makes them a go-to recipe for gatherings. Encourage your loved ones to join in on the fun of making these treats and create sweet memories together! Give this recipe a try, and enjoy a tasty treat that captures the spirit of Halloween.
PrintHalloween Mummy Treats
Easy and fun Halloween-themed treats made with Rice Krispies, marshmallows, and decorated like mummies.
- Prep Time: 10 minutes
- Cook Time: 5 minutes
- Total Time: 15 minutes
- Yield: 12 servings
- Category: Dessert
- Method: No-Bake
- Cuisine: American
- Diet: Vegetarian
Ingredients
- 6 cups Rice Krispies cereal
- 1 package (10 oz) marshmallows
- 3 tablespoons butter
- White chocolate (for drizzling)
- Candy eyes (for decoration)
Instructions
- Melt the butter in a large saucepan over low heat.
- Add the marshmallows to the melted butter and stir until melted and smooth.
- Combine with the Rice Krispies cereal, stirring until well-coated.
- Press the mixture firmly into a greased 9×13 inch pan.
- Cut into rectangular pieces once cooled.
- Melt white chocolate and drizzle over the treats.
- Add two candy eyes to each treat while the chocolate is still wet.
Notes
For a fun twist, you can customize the decorations with various sprinkles or chocolate.












