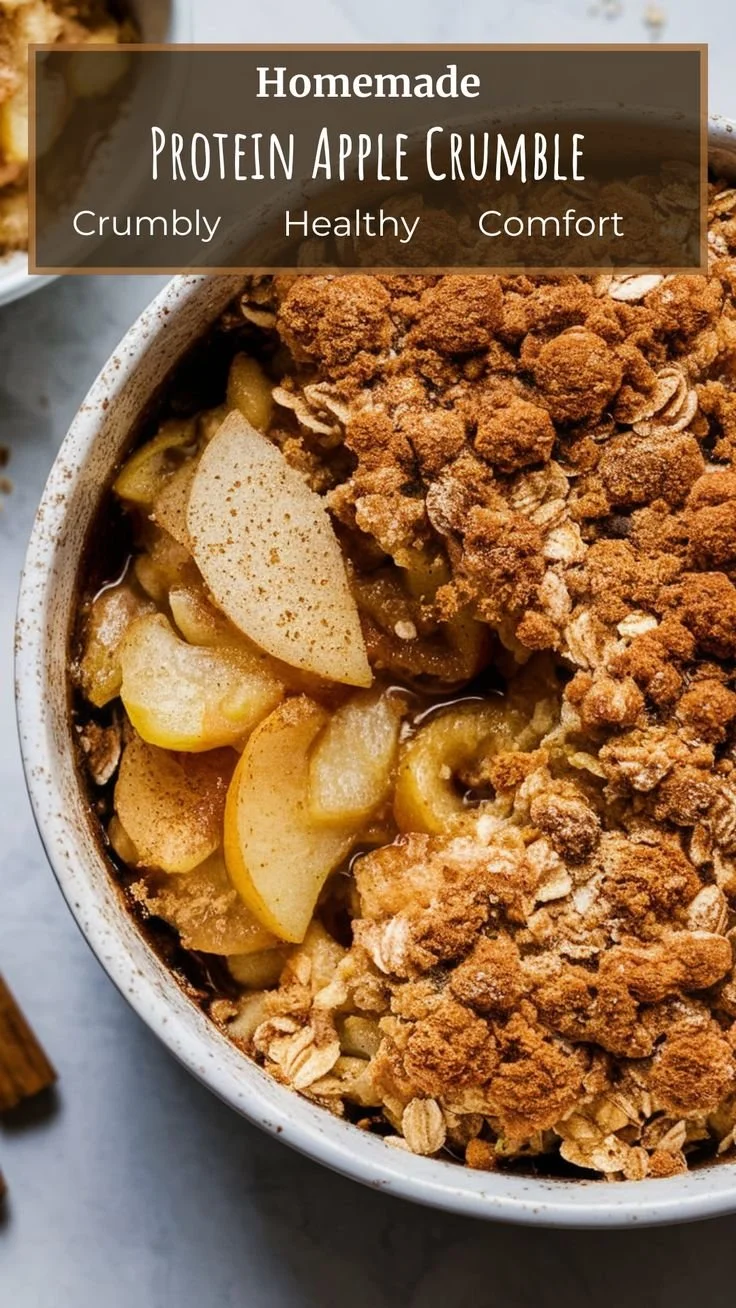
When you think of a comforting dessert perfect for gatherings or a cozy night in, the classic apple crisp comes to mind. This Healthy Apple Crisp recipe is not only simple to prepare but also offers a delightful balance of sweet and tart flavors, making it a wonderful treat for all occasions. Its warm, buttery aroma will fill your kitchen and invite everyone to the table.
Why You’ll Love Healthy Apple Crisp
- Easy to Make: With straightforward steps and minimal prep, even beginners can whip up this delicious dessert without any fuss.
- Healthy Ingredients: This recipe swaps out refined sugars and heavy butter for healthier alternatives, allowing you to enjoy guilt-free indulgence.
- Customizable: Feel free to adjust the sweetness or add spices according to your preference, making it perfect for your taste.
- Perfect for Meal Prep: You can prepare it in advance and just bake when ready, making it an ideal dessert for busy weeks.
- Great for Any Season: Whether it’s apple season in the fall or you just want a comforting dessert year-round, this recipe fits the bill perfectly.
Recipe Overview
- Prep Time: 15 minutes
- Cook Time: 30 minutes
- Total Time: 45 minutes
- Servings: 8 servings
- Difficulty Level: Easy
Ingredients You’ll Need for Healthy Apple Crisp
- Apples (6 medium, peeled and sliced) – Choose a mix of sweet and tart varieties like Fuji and Granny Smith for a balanced flavor.
- Oats (1 cup) – Use rolled oats for the best texture; quick oats may make the topping too mushy.
- Almond flour (½ cup) – Adds wholesome fiber; can substitute with whole wheat flour if preferred.
- Maple syrup (¼ cup) – Acts as a natural sweetener; honey or agave can be used as alternatives.
- Coconut oil (¼ cup, melted) – Provides healthy fats; you can also use unsalted butter if preferred.
- Cinnamon (1 teaspoon) – Adds warmth; feel free to increase based on your spice preference.
- Nutmeg (¼ teaspoon) – A hint is perfect, but you can omit it if you’re not a fan.
- Salt (¼ teaspoon) – Enhances the sweetness and overall flavor.
- Lemon juice (2 tablespoons) – Prevents browning of apples and adds brightness.

here
How to Make Healthy Apple Crisp
- Preheat the Oven: Set your oven to 350°F (175°C). This helps the crisp cook evenly.
- Prepare the Apples: In a large bowl, toss the sliced apples with lemon juice, cinnamon, nutmeg, and a pinch of salt. Spread them evenly in a greased 9×13 inch baking dish.
- Make the Crisp Mixture: In another bowl, combine oats, almond flour, melted coconut oil, and maple syrup. Mix until crumbly and cohesive.
- Top the Apples: Evenly distribute the oat mixture over the apples, ensuring it’s spread out for a consistent bake.
- Bake: Place the dish in the preheated oven and bake for 30-35 minutes or until the apples are tender and the topping is golden brown.
- Cool and Serve: Allow the crisp to cool for a few minutes before serving. It’s delicious on its own or topped with yogurt or ice cream.
Tips for Success
- Slice Evenly: Ensure apple slices are similar in size for uniform cooking.
- Monitor Baking Time: Check the crisp around the 25-minute mark to avoid over-browning.
- Let It Rest: Cooling briefly before serving helps it set and ensures easier serving.
- Stay Flexible: Don’t hesitate to adjust spices and sweetness to make it truly your own.
Easy Variations
- Nutty Topping: Add chopped walnuts or pecans to the topping for added crunch and flavor.
- Berry Boost: Incorporate a cup of fresh berries for extra sweetness and antioxidants.
- Spiced Up: Experiment by adding ginger or all-spice in addition to or instead of cinnamon and nutmeg.
- Gluten-Free: Substitute almond flour with gluten-free oat flour to keep it gluten-free.
What to Serve with Healthy Apple Crisp
- Vanilla Ice Cream: A classic pairing; its creaminess contrasts beautifully with the warm crisp.
- Greek Yogurt: Adds a creamy texture and a tangy flavor that balances the sweetness of the crisp.
- Caramel Sauce: Drizzle on top for added indulgence and flavor depth.
- Hot Tea or Coffee: A warm beverage complements the dessert’s warmth and creates a cozy vibe.
Storage and Reheating
- Refrigerator Storage: Store leftovers in an airtight container in the refrigerator for up to 4 days.
- Freezer Storage: You can freeze the uncooked apple crisp for up to 3 months. Wrap it tightly in plastic wrap and then foil.
- Reheating: For best results, reheat in the oven at 350°F (175°C) for about 15-20 minutes until warmed through.
- Maintain Texture: Cover with foil if browning too quickly while reheating.
Common Mistakes to Avoid
- Overmixing: When making the topping, mix just until combined to keep it crumbly.
- Using Overripe Fruit: Choose firm apples; overripe fruit can turn to mush during baking.
- Skipping the Lemon Juice: It not only prevents browning but enhances the overall flavor of the apples.
Healthy Apple Crisp: Background & Cultural Inspiration
Apple crisp has roots in American home cooking, where it was developed as a rustic dessert, often using minimal ingredients. It showcases seasonal ingredients and thrived during times when apples were abundant and affordable. Throughout history, it served as a ways to use up leftover ingredients, making it a staple in many families’ dinner tables. Today, it remains a beloved dessert that brings nostalgia and warmth to gatherings, embodying the essence of comfort food.
Frequently Asked Questions
Can I use other fruits in lieu of apples?
Absolutely! Pears, peaches, or berries make delightful substitutes or additions to the apple base.
How do I know when the apples are done?
Apples should be tender and easily pierced with a fork. The topping should be golden brown for a perfect crisp texture.
Can I make this a day ahead?
Yes, you can assemble it a day in advance. Just bake it before serving to enjoy it warm.
What’s the best way to reheat leftovers?
For optimal texture, reheat in the oven instead of the microwave to keep the topping crisp.
Can I sweeten it more?
Yes, feel free to adjust the maple syrup to your liking, but start with the suggested amount to maintain balance.
Final Thoughts
This Healthy Apple Crisp recipe is a delightful choice for anyone seeking a comforting dessert that is also wholesome. It’s easy to prepare, making it perfect for any occasion, from family dinners to simple weeknight treats. By giving this recipe a try, you’ll not only enjoy a delicious dessert but also create cherished moments around the table.