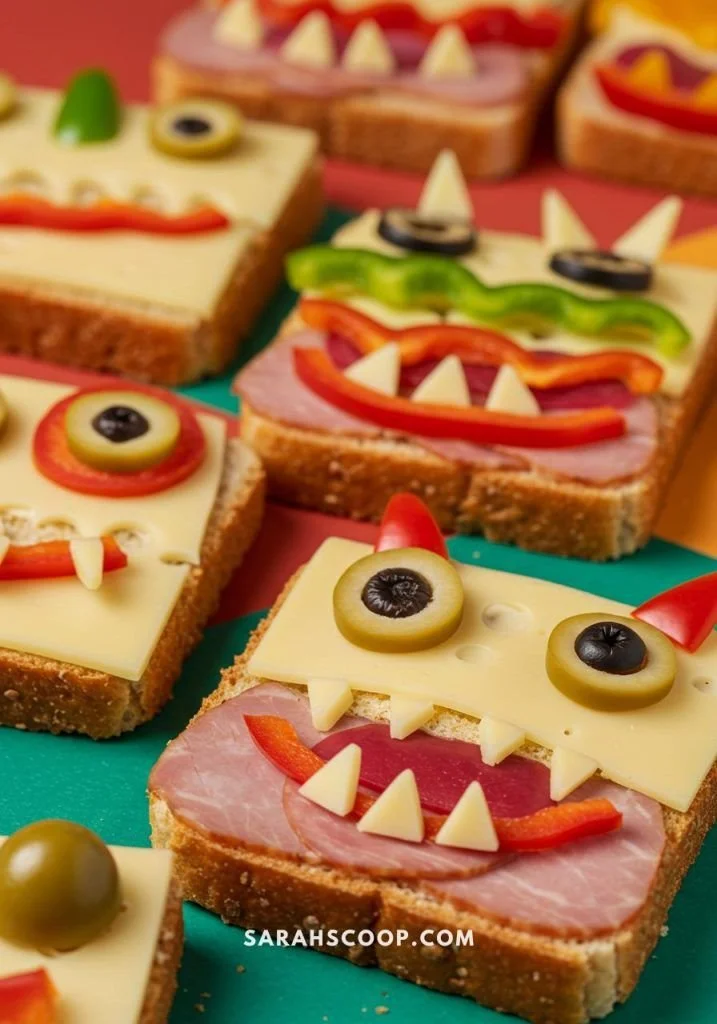
Monster Mouth Sandwiches are a fun and creative way to enjoy a delicious snack, especially perfect for parties or Halloween gatherings. With their spooky appearance and easy preparation, these sandwiches are sure to delight both kids and adults alike. Plus, they offer a playful twist on traditional sandwiches, making lunchtime exciting!
Why You’ll Love Monster Mouth Sandwiches
- Fun Presentation: The mouth shape and playful “teeth” make these sandwiches visually exciting, perfect for children and festive occasions.
- Easy to Make: With just a few simple steps, even beginner cooks can whip these up with ease, making them a great choice for quick snacks or lunches.
- Customizable Ingredients: You can easily switch up the fillings and toppings based on your preferences, dietary needs, or what you have on hand.
- Engaging for Kids: Getting kids involved in the kitchen becomes a fun activity when making edible monsters, encouraging creativity and making meal prep enjoyable.
- Perfect for Parties: These sandwiches can be a hit at birthday parties, Halloween celebrations, or any snack time, adding a touch of whimsy to your food spread.
Recipe Overview
- Prep Time: 10 minutes
- Cook Time: 0 minutes (no cooking required)
- Total Time: 10 minutes
- Servings: 4
- Difficulty Level: Easy
Ingredients You’ll Need for Monster Mouth Sandwiches
- Bread: Use your favorite type, whether white, whole wheat, or gluten-free.
- Peanut butter or cream cheese: This will serve as a sticky base. Peanut butter offers a classic taste, while cream cheese provides a milder flavor.
- Banana or apple slices: These serve as the fun “teeth” of the monster mouth. Choose firm fruit to ensure they hold shape.
- Mini marshmallows or gummy candies: For added fun and texture, creating a playful and approachable look.
- Red food coloring or strawberry jam: Use around the edges to create a spooky effect, mimicking “blood” for the mouth.

How to Make Monster Mouth Sandwiches
- Spread the Base: Spread a generous layer of peanut butter or cream cheese on slices of bread for a flavorful foundation.
- Shape the Bread: Cut the bread into a mouth shape using a knife. Alternatively, you can simply cut the sandwiches into quarters for bite-sized pieces.
- Create the Teeth: Fill the “mouth” with slices of banana or apple to create “teeth.” Aim for a fun arrangement to maximize the cute factor.
- Add Fun Details: Place mini marshmallows or gummy candies inside the mouth to add character and sweetness.
- Add the Spooky Touch: Optionally, outline the edges of the sandwiches with red food coloring or strawberry jam for an added Halloween touch.
- Serve and Enjoy: Present your Monster Mouth Sandwiches to your friends and family, and enjoy the delightful reactions!
Tips for Success
- Freshness Matters: Use fresh bread and fruits for the best texture and flavor. Overripe bananas can become mushy and may not hold up well.
- Efficiency: If making for a group, prepare all the components in advance and assemble just before serving to prevent sogginess.
- Experiment with Fillings: Feel free to swap in different nut butters or cream cheeses to match your taste. Almond butter or flavored cream cheeses can add unique flavors.
- Pack with Care: If packing these for lunch, keep the banana or apple slices separate until it’s time to eat to maintain a fresh taste.
- Use a Cookie Cutter: For a fun twist, use cookie cutters to create different shapes for the sandwiches.
Easy Variations
- Nut-Free Option: Use sunflower seed butter or soy nut butter to make these sandwiches nut-free, suitable for school lunches.
- Fruity Swaps: Instead of bananas or apples, try using slices of strawberries or pears for a different taste and look.
- Chocolate Twist: For a sweeter version, use chocolate spread instead of peanut butter or cream cheese.
- Savory Option: Swap the sweet fillings for sliced cucumbers and cream cheese to make “monster mouths” that are purely savory.
- Dipping Fun: Instead of jam around the edges, serve alongside a sweet dip, like yogurt mixed with honey.
What to Serve with Monster Mouth Sandwiches
- Veggie Sticks: Carrot and cucumber sticks are healthy, crunchy options that contrast well with the softness of the sandwiches.
- Fruit Salad: A light, refreshing fruit salad can complement the sandwiches and add a sweet touch.
- Chips or Crisps: A bowl of chips or vegetable crisps provides a savory crunch, balancing the sweetness of the sandwiches.
- Juice Boxes: These are a whimsical and kid-friendly drink pairing that completes the meal.
- Yogurt Cups: Individual yogurt cups can add creaminess and are an easy way to round out the snack.
Storage and Reheating
- Refrigerator Storage: Store assembled sandwiches in an airtight container in the fridge for up to 1 day. To keep them fresh, avoid adding wet ingredients until just before serving.
- Freezer Storage: While these sandwiches are best made fresh, you can freeze unassembled components separately to prepare them later.
- Best Reheating Method: If sandwiches have been refrigerated, serve them cold for the best experience. If frozen, let them thaw in the fridge overnight before assembly.
- Texture Preservation: To maintain texture, avoid freezing fully assembled sandwiches due to the potential for sogginess from fruit.
Common Mistakes to Avoid
- Using Overripe Bananas: They can fall apart and become mushy, making it challenging to achieve the desired “teeth” effect.
- Slicing Ingredients Too Thin: Ensure your banana and apple slices are thick enough to hold in the sandwich without breaking.
- Too Much Filling: Overstuffing can cause the sandwiches to fall apart. Use just enough to keep the “mouth” intact.
- Not Preparing Ahead: Preparing ingredients in advance can save time but should be assembled close to serving time to maintain freshness.
- Forgetting the Fun Factor: Don’t skip the mini marshmallows or gummy candies; they add a whimsical touch that elevates the dish’s appeal.
Monster Mouth Sandwiches: Background & Cultural Inspiration
Monster Mouth Sandwiches are a playful addition to a variety of food traditions that involve imaginative presentations. Inspired by children’s literature and the joy of Halloween, they encourage creativity in food preparation, appealing to both young and adult audiences. This dish emphasizes the joy of playful eating, highlighting the concept that food can be fun and engaging. It aligns with many cultures’ traditions of making food presentations memorable, turning everyday meals into special occasions.
Frequently Asked Questions
Can I make these sandwiches ahead of time?
You can prepare the components ahead of time, but it’s best to assemble the sandwiches right before serving to maintain freshness.
What are some good substitutes for bread?
You can use pita bread, tortilla wraps, or even rice cakes instead of traditional bread for a different texture.
How can I make these sandwiches more nutritious?
Consider adding protein-rich fillings like Greek yogurt or adding chia seeds to the peanut butter for an extra nutrient boost.
Can I use other fruits as teeth?
Absolutely! Any firm fruit, like pears or even strawberries, can work as creative alternatives for the teeth.
How do I troubleshoot a sandwich that falls apart?
Be sure to slice the fruit thickly and not overstuff the sandwich. Additionally, a less spreadable base like cream cheese may help with stability.
Final Thoughts
Monster Mouth Sandwiches are not only a delicious addition to your culinary repertoire but also a way to bring joy and creativity to your kitchen. Whether you’re preparing them for a festive occasion or just a fun lunch, their playful nature ensures they’ll be a hit. Don’t hesitate to experiment with different fillings and pairings to make them your own, and enjoy the smiles they bring to your table!












