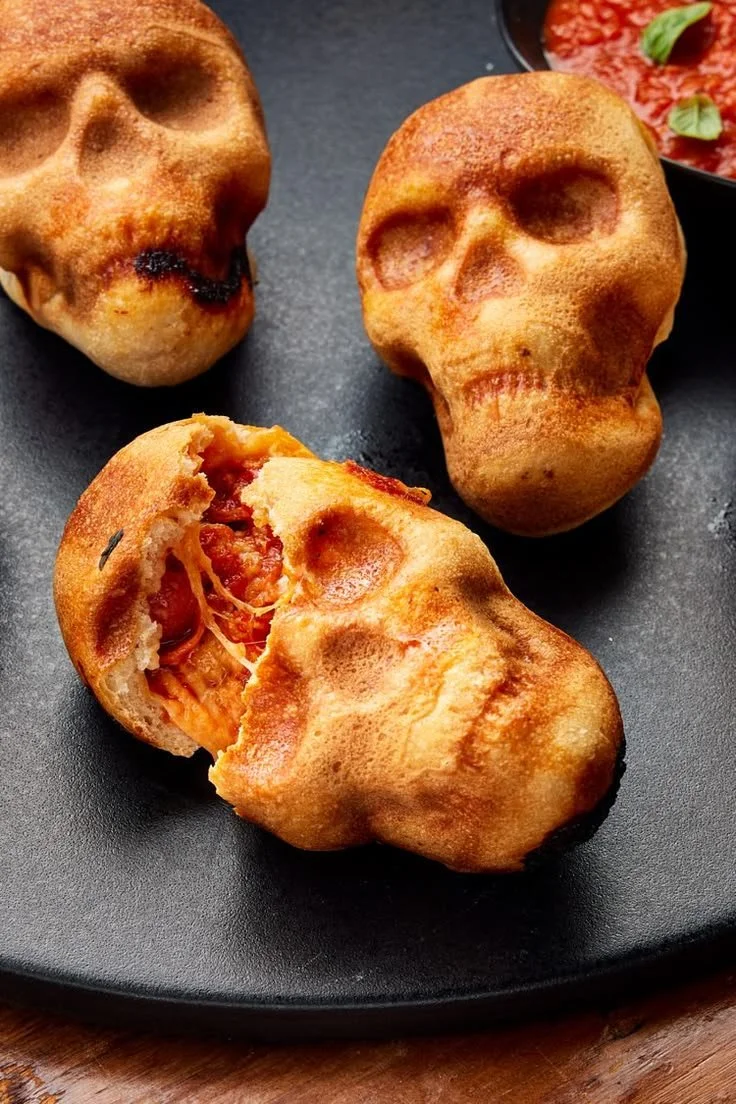
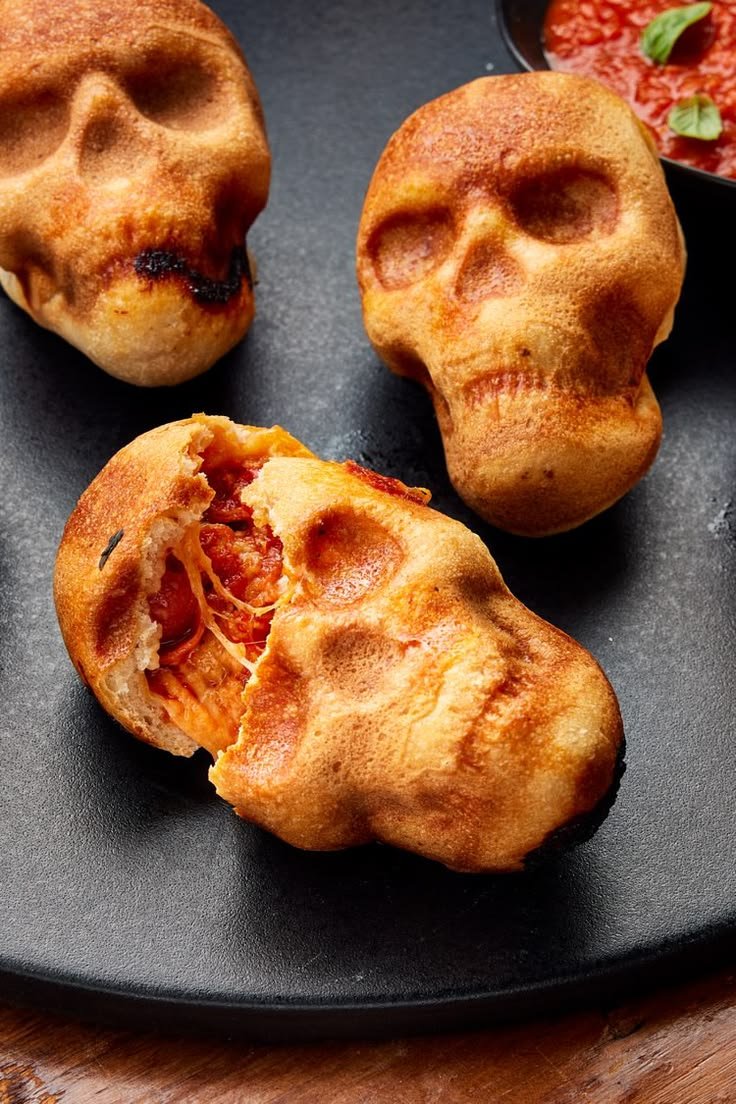
Pizza Skulls Are the Deliciously Spooky Snack You Need This Halloween is a fun and creative treat that will make your Halloween celebrations extra special. These delightful pastry pockets filled with gooey cheese and your favorite toppings are perfect for parties, family gatherings, or just a cozy night in. Not only are they easy to make, but they’re also a hit with both kids and adults, making them a must-try for the season.
Why You’ll Love Pizza Skulls
- Creative Presentation: These skull-shaped snacks add a playful twist to your usual pizza bites, creating an eye-catching dish that sparks conversation.
- Versatile Filling Options: You can customize the filling to suit your family’s tastes. From classic pepperoni to veggies or even dessert fillings, the choices are endless.
- Easy to Make: Even novice cooks can successfully whip up these pizza skulls, as the recipe requires minimal skills and ingredients.
- Perfect for Meal Prep: These treats can be prepared ahead of time, making them a great option for Halloween parties or as an easy after-school snack.
- Kid-Friendly Fun: Kids will love both making and eating these spooky snacks, making it a great activity to enjoy together.
Recipe Overview
- Prep Time: 20 minutes
- Cook Time: 15 minutes
- Total Time: 35 minutes
- Servings: 8 skulls
- Difficulty Level: Easy
Ingredients You’ll Need for Pizza Skulls
- Pizza Dough: About 1 pound of store-bought or homemade pizza dough. A thin crust works best.
- Cheese: 1 cup of mozzarella cheese, shredded for that classic pizza gooeyness.
- Toppings: Choose 1 cup of your favorite fillings (pepperoni slices, diced bell peppers, mushrooms, etc.)
- Cooking Spray: For greasing the mold and preventing sticking.
- Flour: A little for dusting your work surface.
- Egg Wash (Optional): 1 egg beaten with a splash of water, for brushing the tops of the skulls for a shiny finish.
How to Make Pizza Skulls
-
Preheat Oven: Preheat your oven to 400°F (200°C) to ensure it’s hot when the pizza skulls go in.
-
Prepare the Dough: On a lightly floured surface, roll out the pizza dough until it’s about 1/4 inch thick. Use flour to prevent sticking.
-
Cut the Dough: Using a skull-shaped cookie cutter, cut out pieces of dough. You will need two pieces for each skull (one for the base and one for the top).
-
Fill the Skulls: Place a skull cutout on a baking sheet lined with parchment paper. Add about 2 tablespoons of cheese and your selected toppings on top. Leave a little space around the edges.
-
Seal the Skull: Place another skull piece on top of the filled base. Press the edges together firmly to seal. Use a fork to crimp the edges for an extra secure seal.
-
Add Egg Wash (Optional): Brush the top of each skull with the egg wash for a golden brown finish.
-
Bake: Place the baking sheet in the preheated oven and bake for 12-15 minutes or until the skulls are golden brown.
-
Cool and Serve: Let the pizza skulls cool slightly on a wire rack before serving them warm.
Tips for Success
- Don’t Overspill: Make sure not to overfill the skulls, as this can make them difficult to seal properly.
- Use a Non-Stick Spray: Even if you line your baking sheet, spray it lightly to avoid sticking.
- Egg Wash Alternatives: If you prefer a vegan option, skip the egg wash or use almond milk for a similar sheen.
- Cooking Time: Keep an eye on the skulls during the last few minutes of baking to avoid burning.
- Experiment with Fillings: Add fresh herbs or spices for an extra flavor kick.
Easy Variations
- Vegetarian Style: Use spinach, artichokes, and feta cheese for a tasty meatless option.
- Dessert Skulls: Substitute the savory fillings for sweet ingredients like chocolate or fruit preserves for a fun dessert version.
- Spicy Kick: Add jalapeños or hot sauce to the cheese filling for a spicier treat.
- Breakfast Skulls: Fill with scrambled eggs, cheese, and bacon for a breakfast-themed twist.
- Gluten-Free Option: Use gluten-free pizza dough for those with dietary restrictions.
What to Serve with Pizza Skulls
- Marinara Sauce: A classic pairing, serve a small bowl of warm marinara for dipping.
- Garlic Bread: Complement the pizza skulls with a side of crispy garlic bread for a filling meal.
- Salad: A simple green salad balances out the heaviness of the pizza skulls and adds freshness.
- Veggie Platter: Pair with a platter of fresh veggies and dipping sauces for a colorful and healthy side.
- Apple Slices with Caramel Dip: For a sweet touch, serve apple slices with caramel dip on the side.
Storage and Reheating
- Refrigerator Storage: Store leftover pizza skulls in an airtight container in the fridge for up to 3 days.
- Freezer Storage: These can also be frozen before baking. Just wrap each skull in plastic wrap and then in foil, storing them for up to a month. Bake straight from the freezer, adding a few extra minutes to the cooking time.
- Best Reheating Method: Reheat in a toaster oven or conventional oven at 350°F (175°C) for about 10 minutes to restore crispiness.
- Meal Prep: Consider making a double batch for a quick snack option throughout the week.
Common Mistakes to Avoid
- Overfilling: Adding too many ingredients can cause the skulls to burst during baking.
- Not Sealing Properly: Make sure the edges are tightly sealed to avoid leaks.
- Incorrect Oven Temperature: Ensure your oven is properly preheated for even cooking.
- Rushed Cooling: Let the skulls cool a bit before biting into them; they can be very hot inside.
- Skipping Greasing: Always use cooking spray or parchment paper to prevent sticking.
Pizza Skulls: Background & Cultural Inspiration
Pizza skulls draw inspiration from traditional Italian calzones and stuffed pastries, both popular for their convenience and flavorful fillings. In Italy, these baked goodies often incorporate a variety of regional ingredients and reflect personal flavors. By giving them a spooky twist, especially during Halloween, pizza skulls become a fun way to celebrate and enjoy food creatively, perfect for social occasions.
Frequently Asked Questions
Can I use store-bought pizza dough?
Yes, store-bought pizza dough saves time and works just as well for making pizza skulls.
How long can I store leftovers?
Leftover pizza skulls can be refrigerated for up to 3 days and frozen for up to a month.
Can I make these ahead of time?
Absolutely! You can prepare the skulls and freeze them before baking for a quick treat later.
What fillings can I use besides cheese and meat?
You can use any combination of vegetables, cheese, or even sweet fillings like chocolate or jam.
Can I bake these on a regular baking sheet?
Yes, but using a skull-shaped mold or cookie cutter helps achieve the fun shape and makes serving easier.
Final Thoughts
Pizza Skulls Are the Deliciously Spooky Snack You Need This Halloween are a delightful way to enjoy the spooky season. With their easy preparation, customizable fillings, and fun shape, they bring joy to Halloween gatherings and cozy nights at home. Give this recipe a try, and create a playful treat that is sure to please everyone. Enjoy the festivities and watch these tasty bites disappear!
PrintPizza Skulls

Deliciously spooky snacks filled with cheese and your favorite toppings, perfect for Halloween parties and family gatherings.
- Prep Time: 20 minutes
- Cook Time: 15 minutes
- Total Time: 35 minutes
- Yield: 8 skulls
- Category: Snack
- Method: Baking
- Cuisine: Italian
- Diet: Vegetarian
Ingredients
- 1 pound pizza dough
- 1 cup mozzarella cheese, shredded
- 1 cup favorite toppings (pepperoni, bell peppers, mushrooms)
- Cooking spray
- Flour for dusting
- 1 egg (beaten with a splash of water, for egg wash)
Instructions
- Preheat your oven to 400°F (200°C).
- Roll out the pizza dough on a lightly floured surface until it’s about 1/4 inch thick.
- Cut out pieces of dough using a skull-shaped cookie cutter (two pieces needed for each skull).
- Place a skull cutout on a baking sheet lined with parchment paper. Add 2 tablespoons of cheese and your selected toppings.
- Seal the skull by placing another piece on top and pressing the edges together firmly.
- Brush the top with egg wash for a golden finish.
- Bake for 12-15 minutes or until golden brown.
- Let the pizza skulls cool slightly before serving.
Notes
For a vegan option, skip the egg wash or use almond milk. Store leftovers in an airtight container for up to 3 days.












