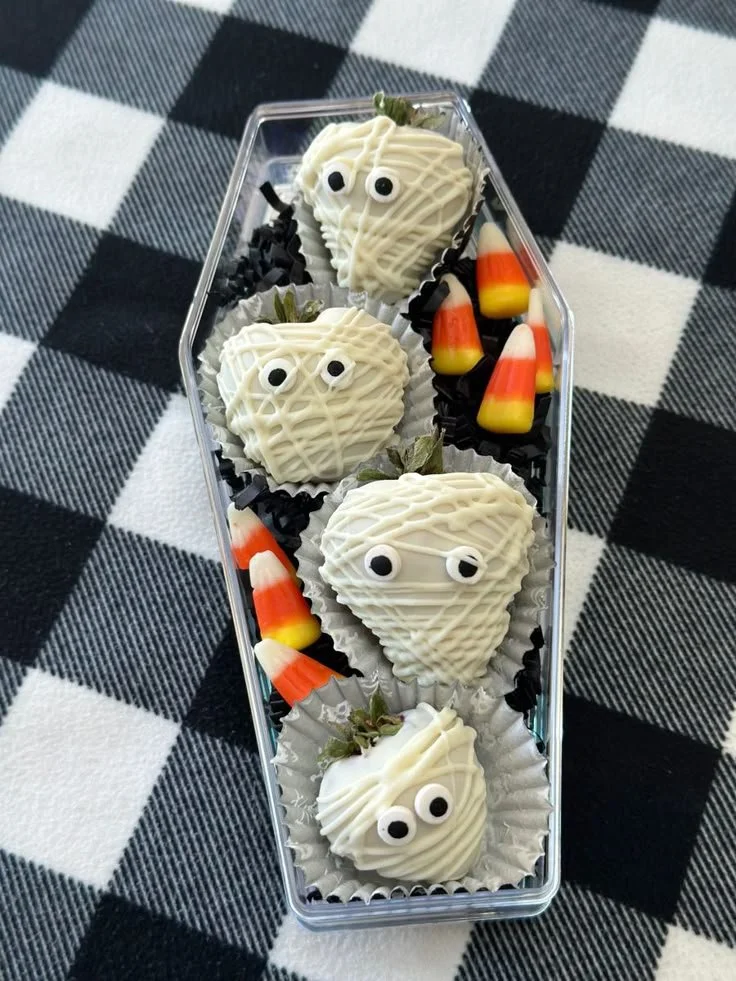
Making your own Spooky Berries is a fun and festive way to celebrate the Halloween season. These adorable, spooky treats are not only simple to whip up but also bring a delightful touch to any Halloween gathering. With just a few ingredients and a little creativity, you can transform ordinary strawberries into treats that look as fun as they taste.
Why You’ll Love Spooky Berries
- Easy to Make: This recipe requires minimal effort, making it perfect for beginners or those short on time. With just a few steps, you’ll have a delicious treat ready to impress.
- Family-Friendly Fun: Whether you’re hosting a Halloween party or just want to have some fun with the kids, decorating these berries is an enjoyable activity that everyone can participate in.
- Healthier Alternative: Compared to many traditional Halloween treats, Spooky Berries offer a refreshing fruity option that’s still festive and fun.
- Customizable: You can get creative with different decorations and colors, tailoring each berry to suit your style or theme.
- Perfect for Parties: These treats make a great addition to Halloween-themed snacks, cookie plates, or dessert tables, adding a touch of whimsy that guests will love.
Recipe Overview
- Prep time: 15 minutes
- Cook time: 0 minutes
- Total time: 15 minutes
- Servings: About 12 Spooky Berries
- Difficulty level: Easy
Ingredients You’ll Need for Spooky Berries
- 12 medium strawberries: Look for firm, ripe strawberries for the best taste and presentation.
- 1 cup white chocolate chips: These will be melted to coat the strawberries. You can substitute with yogurt-covered chocolate if preferred.
- Black food coloring (optional): This is used to create a spooky decoration. You only need a few drops.
- Candy eyes: These fun decorations can be found at craft or party supply stores.
- Piping bag or a plastic bag with the corner cut off: This will help you apply the melted chocolate easily.
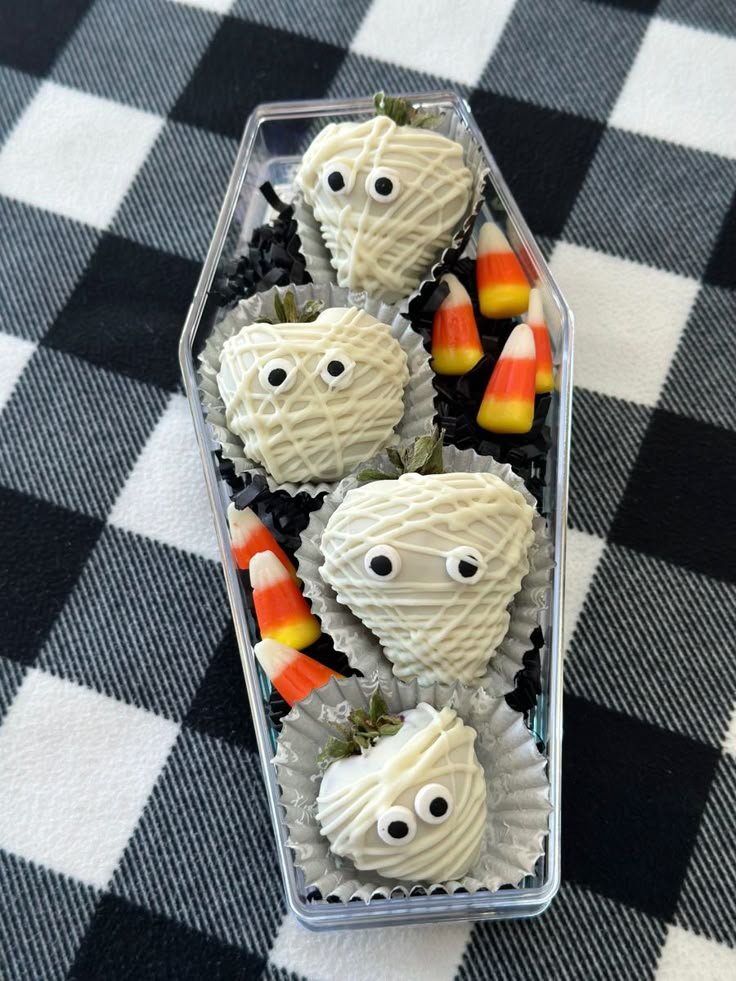
How to Make Spooky Berries
-
Prepare the Strawberries
Rinse the strawberries under cool water and gently pat them dry with paper towels. Ensure they are completely dry before dipping; this helps the chocolate adhere better. -
Melt the Chocolate
Place the white chocolate chips in a microwave-safe bowl. Heat in the microwave in 30-second intervals, stirring after each interval until smooth and fully melted. -
Add Coloring (Optional)
If you want to create a spooky effect, add a few drops of black food coloring to the melted chocolate and stir until you achieve a uniform color. -
Dip the Strawberries
Holding a strawberry by the stem, dip it into the melted chocolate until fully coated. Allow excess chocolate to drip off, then place it on a baking sheet lined with parchment paper. -
Decorate the Berries
While the chocolate is still soft, press two candy eyes onto each berry. If you’re using a piping bag, you can use some of the leftover chocolate to create additional spooky designs, like spider webs or drips. -
Let Set
Place the decorated strawberries in the refrigerator for about 10-15 minutes, or until the chocolate hardens completely.
Tips for Success
- Use Fresh Strawberries: Always use fresh strawberries as they provide the best flavor and texture.
- Watch the Chocolate: When melting, be careful not to overheat the chocolate, as it can seize up and become unusable.
- Keep Everything Dry: Make sure both the strawberries and bowl used for melting chocolate are dry. Any moisture can make the chocolate clump.
- Experiment with Colors: Use different colored chocolate melts for various themes or occasions for added fun.
- Use Quality Chocolate: The quality of the chocolate will affect the flavor of your Spooky Berries, so choose a brand that you enjoy.
Easy Variations
- Chocolate Drizzle: After the white chocolate sets, drizzle with melted dark or milk chocolate for a contrasting design.
- Nut Topping: Before the chocolate hardens, sprinkle chopped nuts or coconut flakes for added texture.
- Lollipop Style: Insert a lollipop stick into the strawberries before dipping for a fun, handheld treat.
- Blood Drip Decoration: Use a red chocolate or icing to create "bloody" effects on your Spooky Berries.
- Ghostly Finish: Instead of candy eyes, use black icing to pipe little ghost faces.
What to Serve with Spooky Berries
- Chocolate Covered Pretzels: Their salty crunch pairs well with the sweetness of the strawberries, creating a delightful mix.
- Pumpkin Muffins: Add a seasonal touch with moist pumpkin muffins, perfect for fall.
- Apple Slices: Fresh apple slices provide a healthy contrast to the sugary treats.
- Ghoul Punch: A fruity punch with a spooky color can tie in the Halloween theme.
- Halloween-themed Cheese Board: Combine different cheeses, crackers, and seasonal fruits for a festive snack spread.
Storage and Reheating
- Refrigerator Storage: Store any leftover Spooky Berries in an airtight container in the refrigerator for up to 2 days.
- Freezer Storage: Freezing these berries is not recommended as the texture changes when thawed.
- Best Reheating Method: If you need to re-melt the chocolate for any reason, do so in short intervals in the microwave or over a double boiler.
- Meal Prep Note: These strawberries are best enjoyed fresh, so it’s advisable to prepare them closer to the time they will be served.
Common Mistakes to Avoid
- Neglecting to Dry Strawberries: Skipping drying the strawberries thoroughly can cause the chocolate to slide off.
- Melting Chocolate Too Quickly: Heating chocolate too fast can lead to burning; always go low and slow.
- Not Using Parchment Paper: Always use parchment paper to line your baking sheet; otherwise, the berries may stick.
- Forgetting to Let Chocolate Set: While it’s tempting to dive in right away, allowing the chocolate to fully set is crucial for the best result.
- Overloading on Decorations: Keep designs simple; too many decorative elements can make them less visually appealing.
Spooky Berries: Background & Cultural Inspiration
Spooky Berries embody the fun and playful spirit of Halloween. Throughout history, Halloween has evolved from ancient traditions, celebrating the harvest and warding off spirits. In modern times, it’s become known for its focus on fun, games, and lots of sweets. Treats like Spooky Berries fit perfectly into this festive atmosphere, making them a great choice for gatherings or simply to enjoy during the season. The use of strawberries not only provides a fun representation of seasonal produce but also a healthier alternative to traditional candies, connecting the love for treats with the fun of creativity.
Frequently Asked Questions
Can I use different types of chocolate?
Yes, you can use milk chocolate, dark chocolate, or even colored chocolate melts. Just adjust the melting process according to the type.
How long do Spooky Berries last?
They are best eaten within 1-2 days of preparation when stored in the refrigerator. The chocolate coating may lose its texture over time.
Can I prepare Spooky Berries ahead of time?
Yes, you can prepare them a day in advance. Just store them properly in the fridge to keep them fresh.
What if I can’t find candy eyes?
If you can’t find candy eyes, you can use small chocolate chips or edible markers to create fun faces.
How can I make this a dairy-free treat?
Use dairy-free chocolate chips and ensure the other ingredients are dairy-free.
Final Thoughts
Spooky Berries are a delightful and simple way to make Halloween a little sweeter and a lot more fun. They combine creativity, health, and taste into a festive treat everyone will enjoy. Whether for a party or a family activity, these fun berries are worth making. So gather your ingredients, grab the kids, and let the Halloween spirit come alive in your kitchen!
PrintSpooky Berries
Transform ordinary strawberries into fun and festive Halloween treats with these simple Spooky Berries.
- Prep Time: 15 minutes
- Cook Time: 0 minutes
- Total Time: 15 minutes
- Yield: 12 servings
- Category: Dessert
- Method: No Cook
- Cuisine: American
- Diet: Vegetarian
Ingredients
- 12 medium strawberries
- 1 cup white chocolate chips
- Black food coloring (optional)
- Candy eyes
- Piping bag or plastic bag with corner cut off
Instructions
- Prepare the strawberries by rinsing them under cool water and patting them dry.
- Melt the chocolate in a microwave-safe bowl in 30-second intervals, stirring until smooth.
- Add a few drops of black food coloring to the melted chocolate if desired.
- Dip each strawberry in the melted chocolate until fully coated and let excess chocolate drip off.
- Decorate the berries by pressing candy eyes onto the chocolate while it’s still soft.
- Let the decorated strawberries set in the refrigerator for about 10-15 minutes.
Notes
Always use fresh strawberries for the best flavor. Experiment with different colored chocolates for variations.












