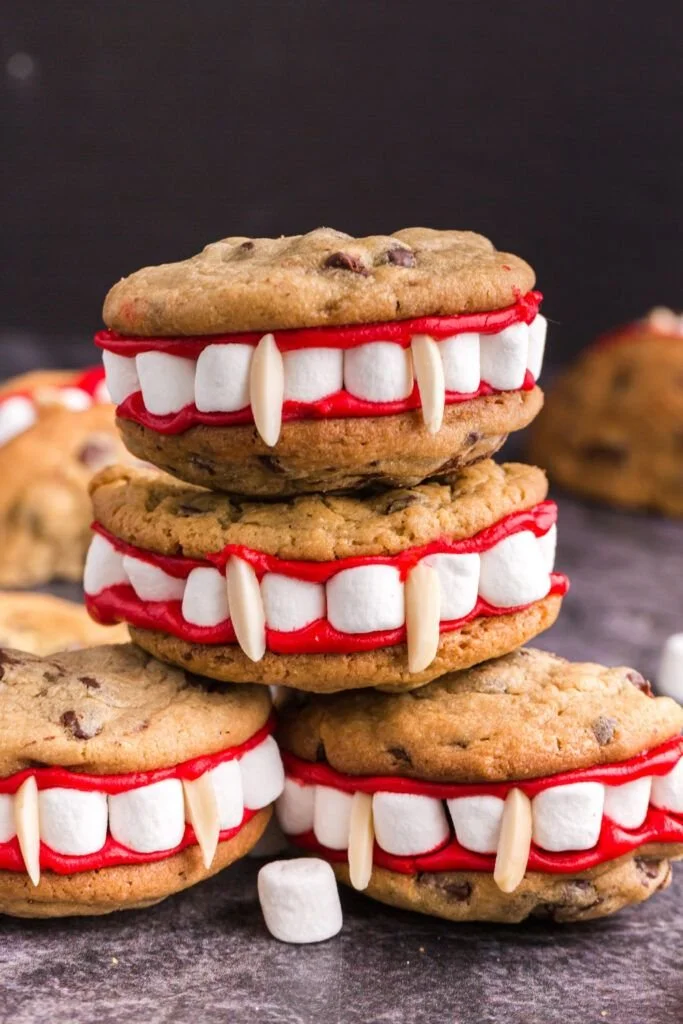
It’s that time of year again when spooky decorations and delightful treats come together to create the perfect Halloween ambiance. These Spooky Vampire Teeth Cookies are not only adorable but also easy to make, making them ideal for a fun baking session with the family. With a blend of sweet and slightly salty flavors, these cookies embody the spirit of Halloween while being an enjoyable treat for everyone.
Why You’ll Love Spooky Vampire Teeth Cookies
- Fun to Decorate: These cookies allow for creativity, whether you’re hosting a party or just enjoying a quiet evening at home. They are a perfect canvas for children and adults alike to unleash their inner artist.
- Simple Ingredients: The recipe requires staples you likely already have in your kitchen. You won’t need to make a special trip to the store.
- Interactive Activity: Making these cookies can be a delightful family activity. Kids will love helping to assemble and decorate, making it a memorable experience.
- Perfect for Parties: These cookies are great for Halloween gatherings, school events, or even themed movie nights. They add a festive touch to any spread.
- Satisfying Flavor: With a combination of sweet and salty flavors, these cookies are sure to delight taste buds and satisfy your sweet tooth.
Recipe Overview
- Prep Time: 20 minutes
- Cook Time: 10 minutes
- Total Time: 30 minutes
- Servings: 12 cookies
- Difficulty Level: Easy
Ingredients You’ll Need for Spooky Vampire Teeth Cookies
-
For the Cookie Base:
- 1 cup all-purpose flour
- 1/2 cup unsweetened cocoa powder
- 1/2 teaspoon baking soda
- 1/4 teaspoon salt
- 1/2 cup unsalted butter, softened
- 1/2 cup granulated sugar
- 1/4 cup brown sugar
- 1 teaspoon vanilla extract
- 1 large egg
-
For the Decoration:
- 1 cup white chocolate chips (for the teeth)
- 1/2 cup red icing (to create the “blood” effect)
- Candy corn (for the pointed teeth look)
How to Make Spooky Vampire Teeth Cookies
-
Prepare the Dough: In a mixing bowl, combine flour, cocoa powder, baking soda, and salt. In a separate large bowl, cream together the softened butter, granulated sugar, brown sugar, and vanilla extract until light and fluffy. Beat in the egg until well combined.
-
Mix Dry Ingredients In: Gradually incorporate the dry mixture into the wet mixture, mixing just until combined. Be careful not to overmix.
-
Shape the Cookies: Preheat your oven to 350°F (175°C). Use a tablespoon to scoop the cookie dough, rolling it into balls. Place them on a lined baking sheet, spacing them two inches apart. Flatten each ball slightly with the back of a spoon.
-
Bake: Bake in the preheated oven for 8-10 minutes or until the edges are firm but the centers are still soft. Remove from the oven and let them cool on the baking sheet for 5 minutes before transferring to a wire rack to cool completely.
-
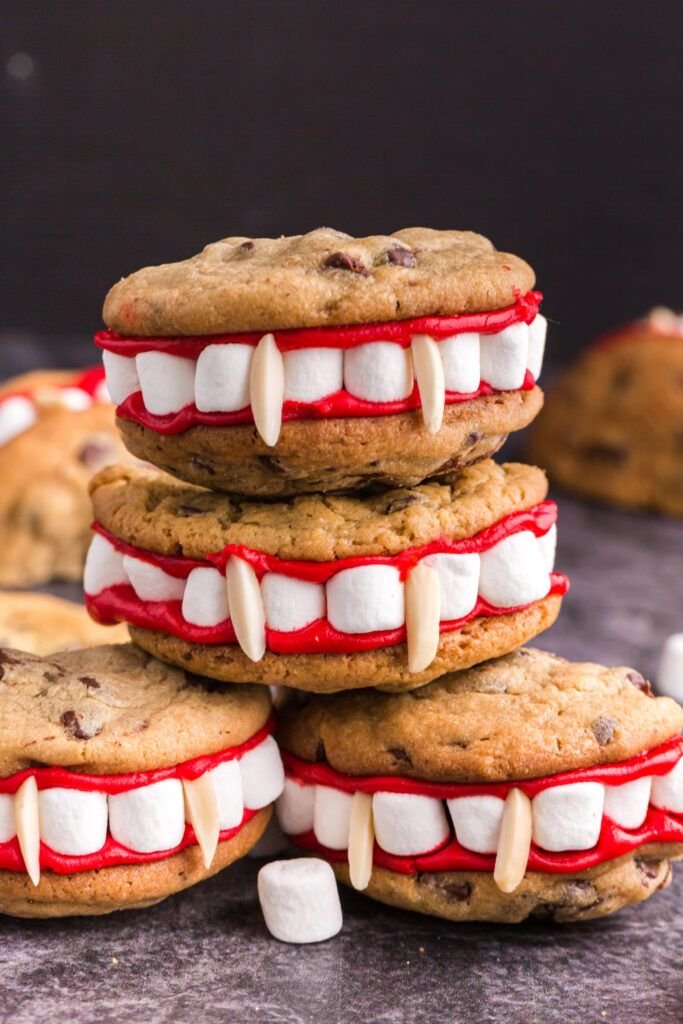
Decorate with Teeth: Once the cookies are cool, melt the white chocolate chips in a microwave-safe bowl, stirring every 30 seconds until smooth. Dip half of a candy corn into the melted white chocolate and place it on the edge of each cookie to resemble a fang.
-
Add the Blood: Use a piping bag or a small spoon to apply red icing around the candy corn teeth to mimic “blood.” For extra fun, you can drizzle some around the cookies too!
Tips for Success
- Chill the Dough: If you find the dough too sticky, chill it in the refrigerator for about 15-30 minutes before shaping the cookies.
- Check Doneness: Remember that the cookies will continue to cook slightly after you take them out of the oven, so don’t overbake!
- Use a Toothpick: If you’re having trouble decorating, a toothpick can help you apply precise details with icing.
- Melting Chocolate: To avoid seizing, ensure no moisture gets into the chocolate when melting it.
Easy Variations
- Different Flavors: Experiment with flavored extract like almond or mint instead of vanilla for a unique twist on the base cookie.
- Nut Butter Addition: Mix in a couple of tablespoons of peanut butter or almond butter for added flavor and richness.
- Colorful Icing: Instead of red icing for the “blood,” try green, blue, or purple to add a colorful Halloween twist.
- Nuts or Candy Mix-Ins: Add chocolate chips, chopped nuts, or candy bits into the dough for added texture.
What to Serve with Spooky Vampire Teeth Cookies
- Halloween Punch: A fruity punch can balance the sweetness of the cookies and adds another festive element to your table.
- Milk: A classic pairing, milk complements the cookies perfectly.
- Fruit Skewers: Add some fresh fruit skewers for a refreshing contrast to the rich cookies.
- Halloween-themed Desserts: Consider serving them alongside other themed treats, like pumpkin-shaped cookies or ghost cupcakes.
Storage and Reheating
- Refrigerator Storage: Store cookies in an airtight container at room temperature for up to a week.
- Freezer Storage: Freeze the decorated cookies in a single layer on a baking sheet, then transfer them to a freezer-safe container. They will keep for up to 3 months.
- Best Reheating Method: To refresh the cookies, warm them in the microwave for about 10 seconds.
- Preserving Texture: To keep cookies soft, place a slice of bread in the container; it will help maintain moisture.
Common Mistakes to Avoid
- Overmixing the Dough: This can cause tough cookies. Mix just until combined.
- Not Measuring Ingredients: Baking is a science; ensure your measurements are accurate.
- Skipping Cooling: Allow cookies to cool completely before decorating to avoid melting your chocolate or icing.
- Wrong Baking Temperature: Always preheat your oven for even baking.
Spooky Vampire Teeth Cookies: Background & Cultural Inspiration
Originating from the tradition of Halloween, these cookies are inspired by the playful spirit of the holiday, where costumes and treats go hand in hand. The idea of “spookiness” gives these cookies a fun twist that fits perfectly with the season. Halloween baking has become a cherished activity in many households, allowing families to create festive memories together through food. These cookies capture that essence, merging creativity with delicious flavors.
Frequently Asked Questions
Can I make these cookies ahead of time?
Absolutely! You can prepare the dough and shape it into balls a day in advance; just store it in the refrigerator until you’re ready to bake.
What if I don’t have white chocolate?
You can use royal icing or any other type of melting chocolate that you prefer for the decoration.
How can I soften hard cookies?
If your cookies become hard, you can place an apple slice or a piece of bread in an airtight container with the cookies for a few hours to help soften them.
Can these cookies be made gluten-free?
Yes, you can substitute all-purpose flour with a gluten-free blend to make them gluten-free!
What variations can I try for the candy decorations?
You can use mini marshmallows or even chocolate-covered almond slices if you’re looking to switch up the decorations!
Final Thoughts
Spooky Vampire Teeth Cookies are a whimsical and enjoyable treat for Halloween that combines creativity with taste. They are not only easy to make but offer countless opportunities for personalization, making them perfect for anyone looking to join in on the festive fun. Bake these delightful cookies this Halloween, and create sweet memories that your family will cherish for years to come!
PrintSpooky Vampire Teeth Cookies

Delightful and whimsical cookies perfect for Halloween, featuring a combination of sweet and slightly salty flavors that are fun to decorate.
- Prep Time: 20 minutes
- Cook Time: 10 minutes
- Total Time: 30 minutes
- Yield: 12 cookies
- Category: Dessert
- Method: Baking
- Cuisine: American
- Diet: Vegetarian
Ingredients
- 1 cup all-purpose flour
- 1/2 cup unsweetened cocoa powder
- 1/2 teaspoon baking soda
- 1/4 teaspoon salt
- 1/2 cup unsalted butter, softened
- 1/2 cup granulated sugar
- 1/4 cup brown sugar
- 1 teaspoon vanilla extract
- 1 large egg
- 1 cup white chocolate chips (for the teeth)
- 1/2 cup red icing (to create the “blood” effect)
- Candy corn (for the pointed teeth look)
Instructions
- Prepare the Dough: In a mixing bowl, combine flour, cocoa powder, baking soda, and salt. In a separate large bowl, cream together the softened butter, granulated sugar, brown sugar, and vanilla extract until light and fluffy. Beat in the egg until well combined.
- Mix Dry Ingredients In: Gradually incorporate the dry mixture into the wet mixture, mixing just until combined. Be careful not to overmix.
- Shape the Cookies: Preheat your oven to 350°F (175°C). Use a tablespoon to scoop the cookie dough, rolling it into balls. Place them on a lined baking sheet, spacing them two inches apart. Flatten each ball slightly with the back of a spoon.
- Bake: Bake in the preheated oven for 8-10 minutes or until the edges are firm but the centers are still soft. Remove from the oven and let them cool on the baking sheet for 5 minutes before transferring to a wire rack to cool completely.
- Decorate with Teeth: Once the cookies are cool, melt the white chocolate chips in a microwave-safe bowl, stirring every 30 seconds until smooth. Dip half of a candy corn into the melted white chocolate and place it on the edge of each cookie to resemble a fang.
- Add the Blood: Use a piping bag or a small spoon to apply red icing around the candy corn teeth to mimic “blood.” For extra fun, you can drizzle some around the cookies too!
Notes
Chill the dough if it’s too sticky, and remember that cookies will continue to cook slightly after baking. Use a toothpick for decorating details.












